

Hey, Requiply community! In our last update, we promised PDF export for bookings — and here it is. But that's not all: we've also added product categorization and organization settings so your invoices look as professional as possible.
1. PDF Invoices
Now you can generate an invoice for any booking in one click and send it straight to your customer.
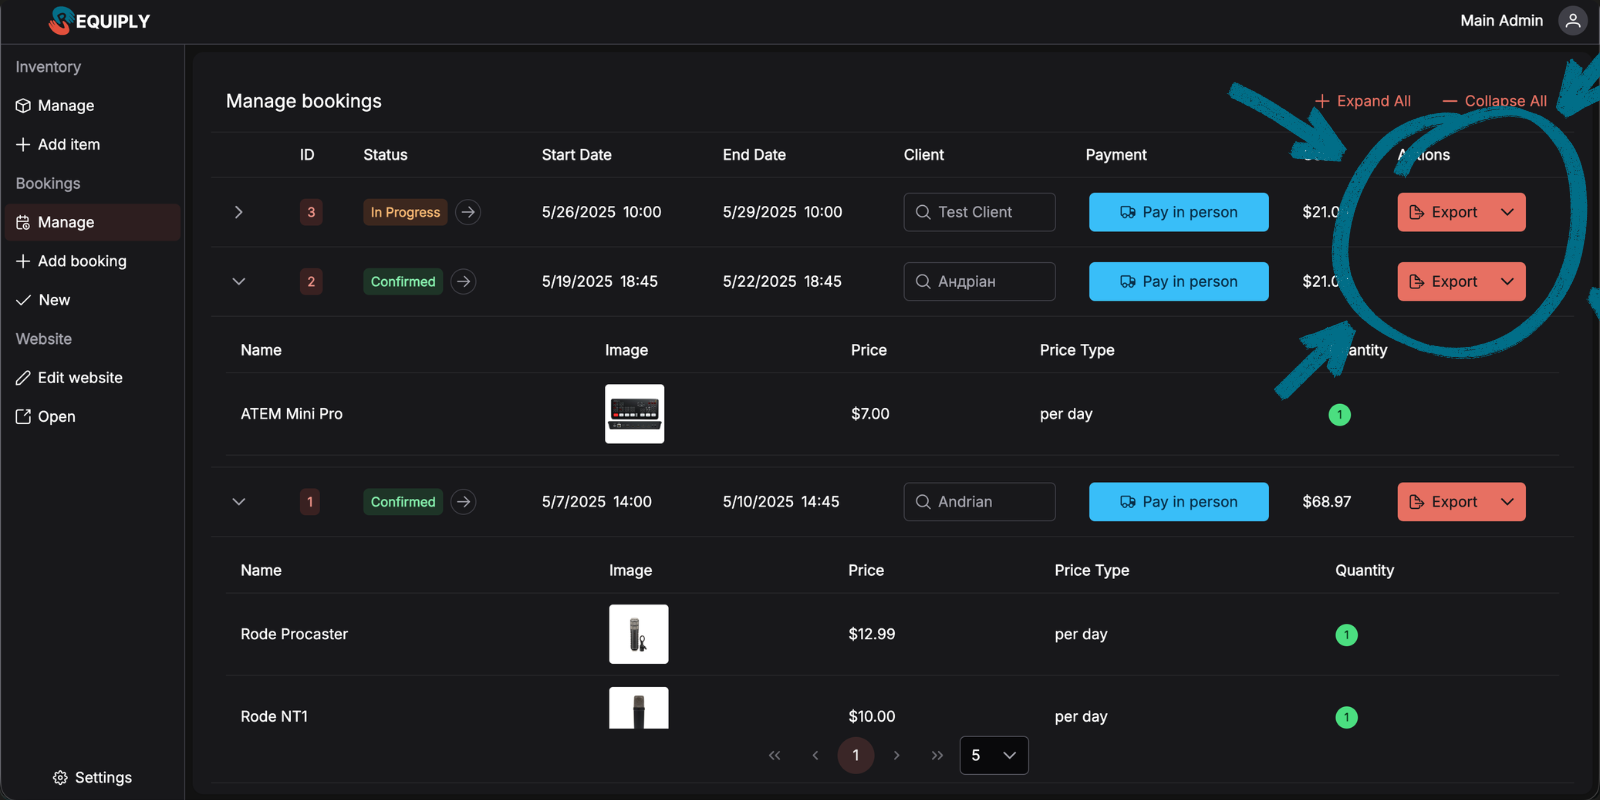
On the "Booking Management" page, you'll find an "Export" button next to each booking. Click it, select "PDF Invoice" — and the system generates a ready-to-send document.
What affects how your invoice looks:
- Name, email, and logo from your organization settings
- Product categories (each category becomes a separate table in the invoice)
- Customer data and booking details
Practical Case: From Customer Call to Payment
Let's walk through a real scenario — a customer calls to book podcast equipment for 3 people.
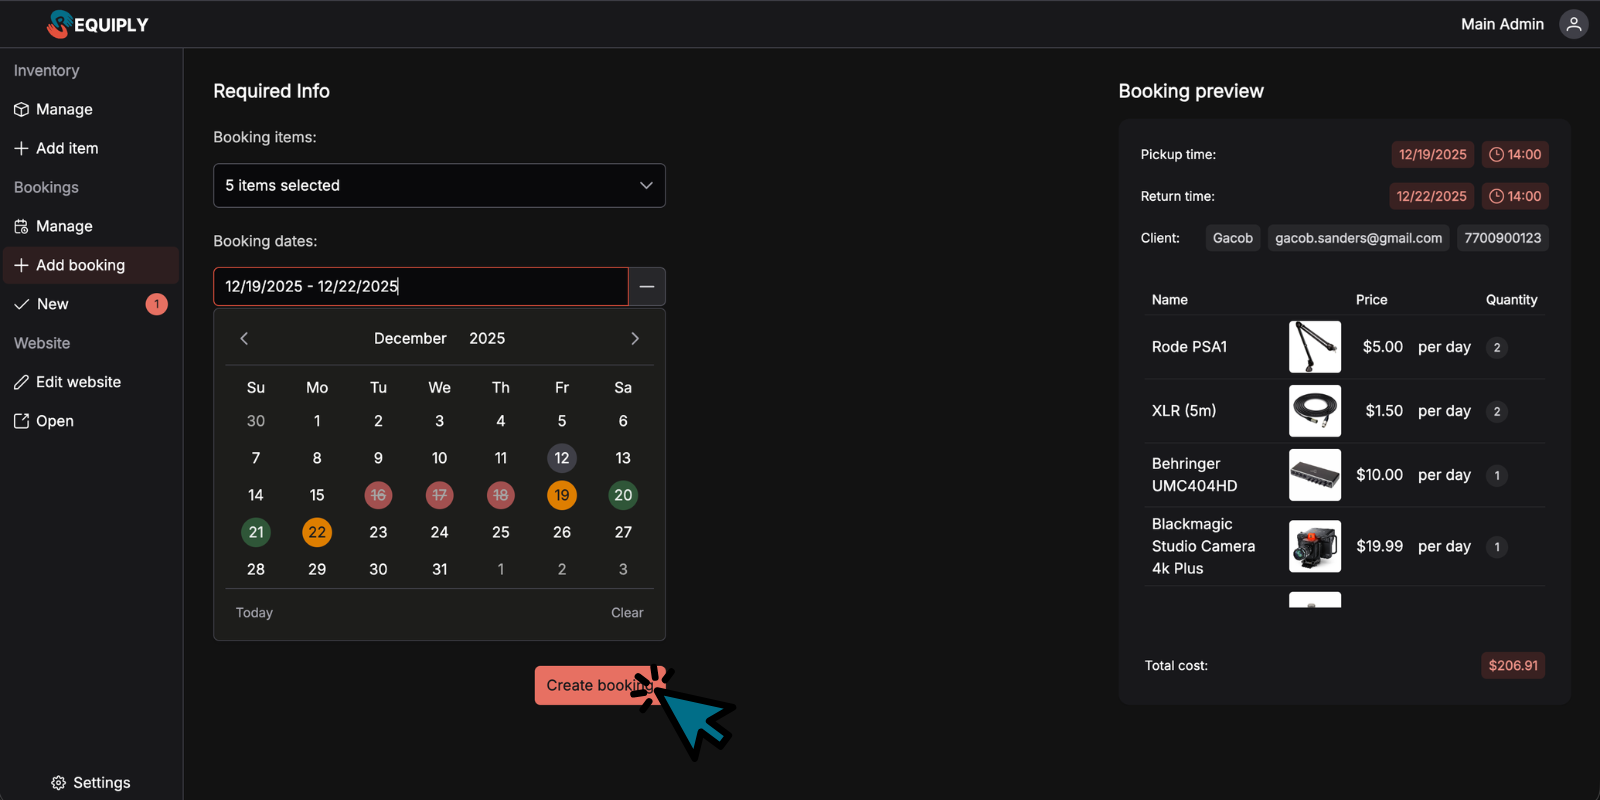
Step 1: Create the Booking
The customer gives you the dates, you select the equipment, and create the booking.
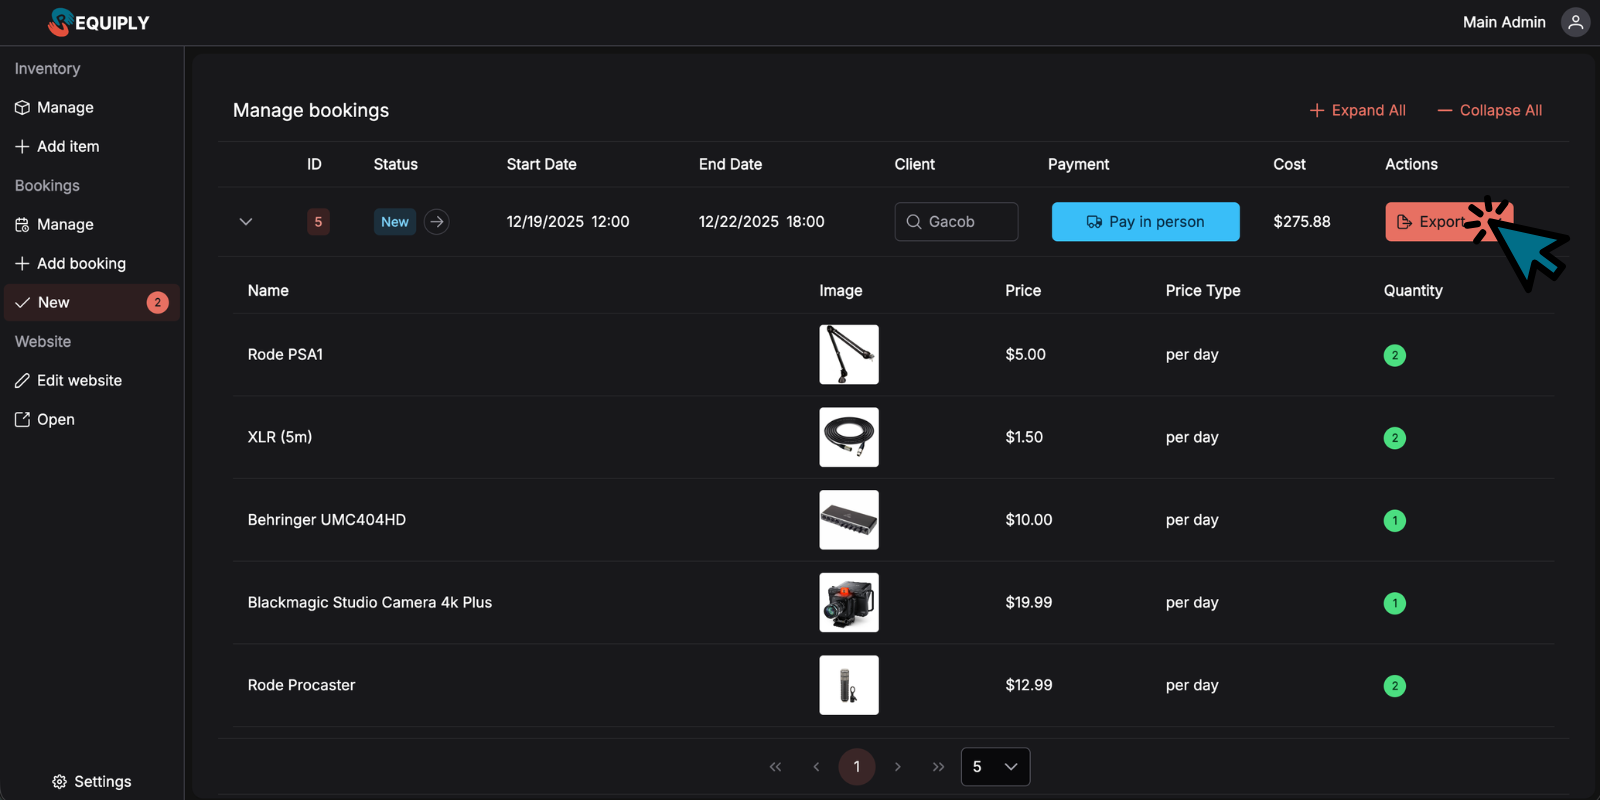
Step 2: Export the Invoice
On the bookings page, find the newly created booking and click "Export".
Step 3: Get the Ready PDF
The system generates an invoice with all booking details, grouped by category.
Step 4: Send to Customer
Send the invoice to your customer via email or messenger. They can review the details and proceed with payment through your preferred method.
Step 5: Confirm Payment
Once payment is received, update the booking status — and the equipment is ready for pickup.
2. Product Categorization
Now you can assign each product to a category — and it's not just for organization.
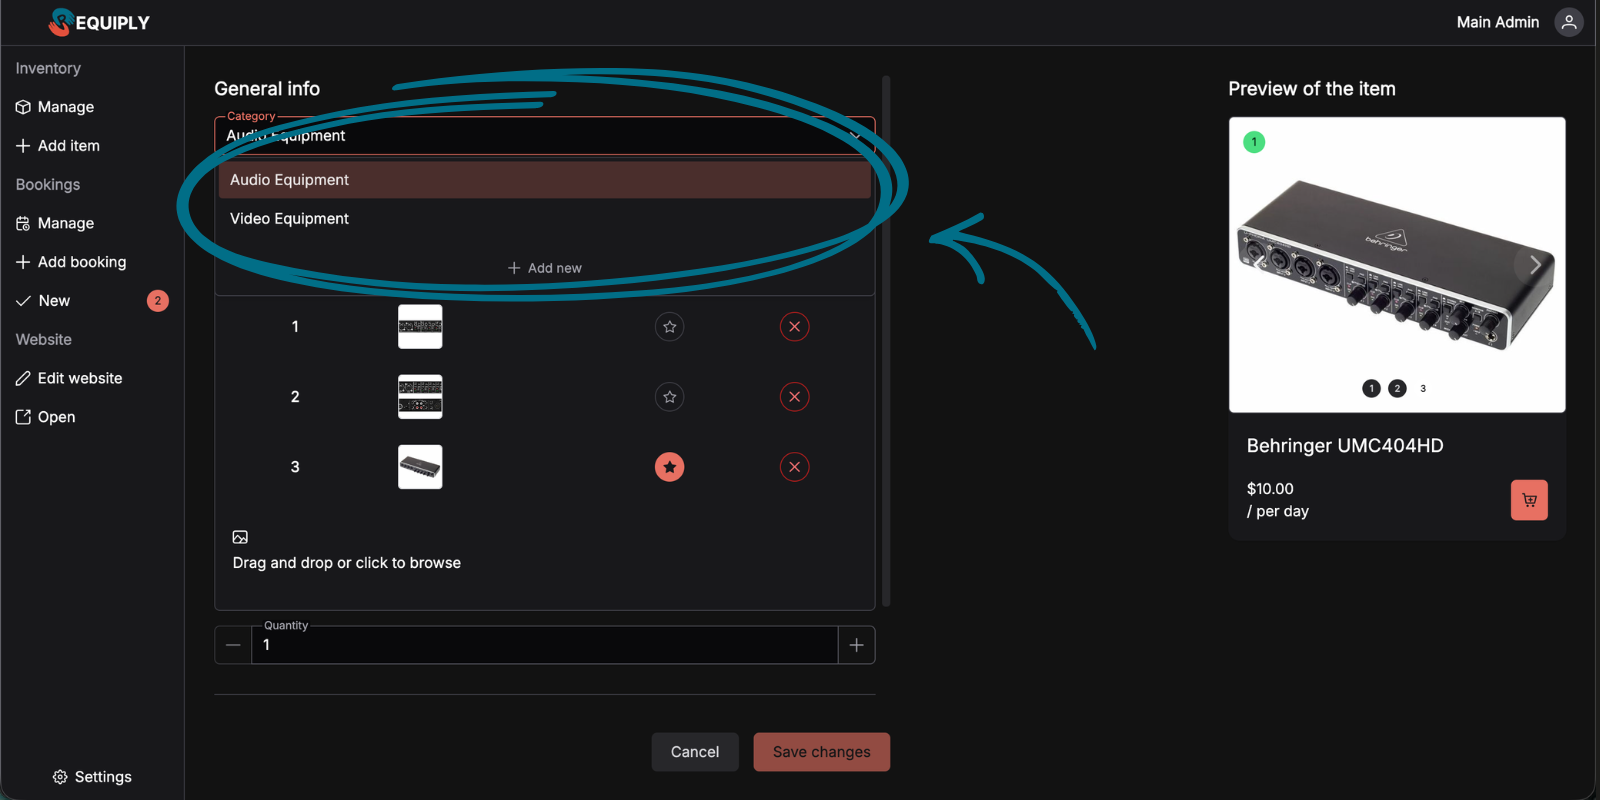
Categories are created right while adding or editing a product: open the category dropdown and click "Add New".
Category examples for different businesses:
- Podcast equipment rental: Microphones, Headphones, Audio Interfaces, Lighting
- Construction tool rental: Power Tools, Hand Tools, Measuring Equipment
- Camera gear rental: Cameras, Lenses, Lighting, Stabilizers
3. Default Photo Selection
Previously, the first uploaded photo automatically became the main one. Now you choose which photo represents your product.
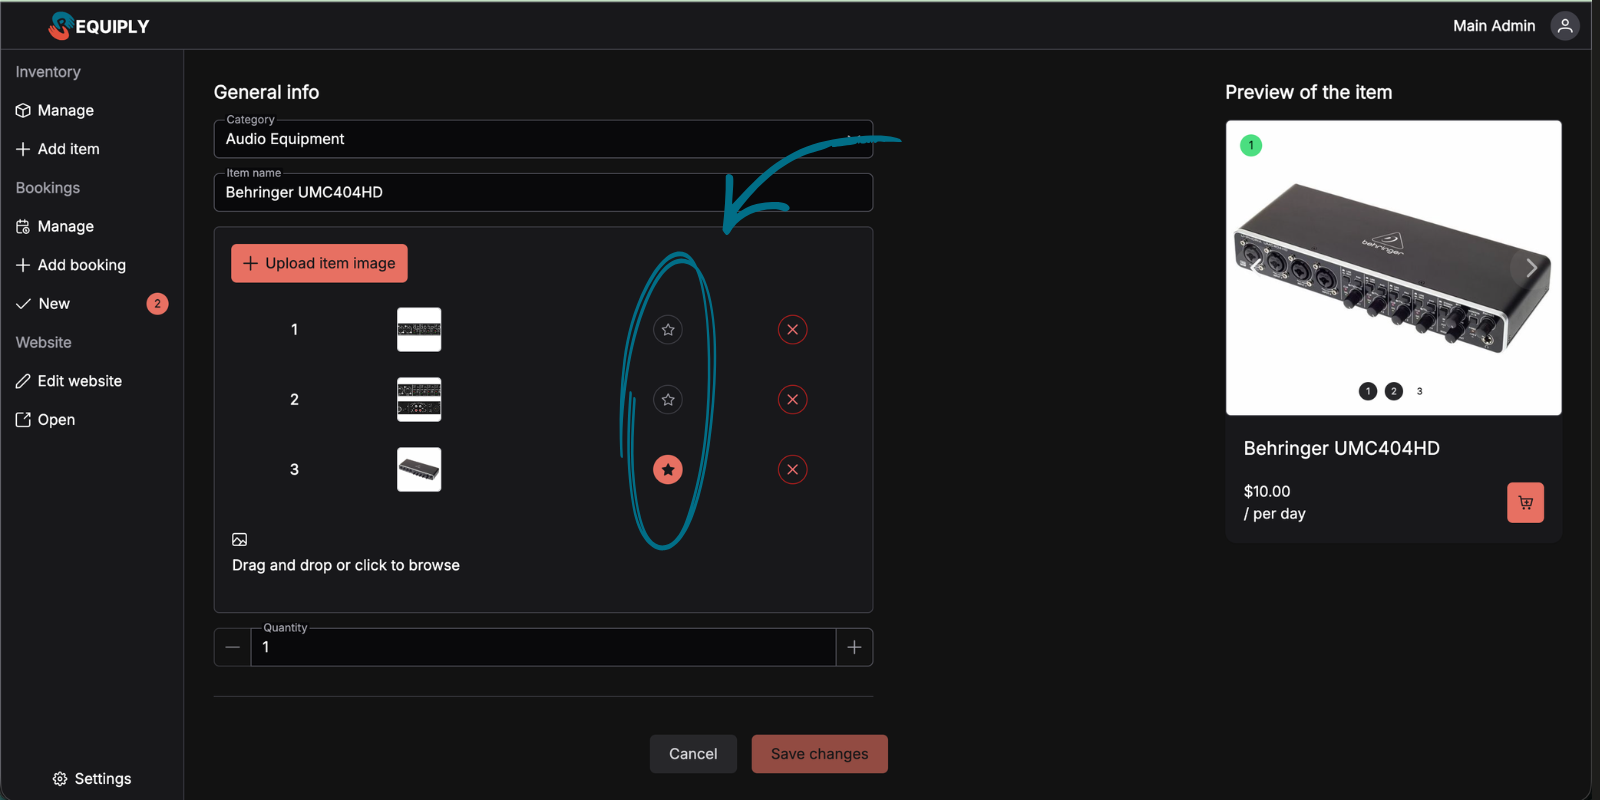
Open product editing, and you'll see a button next to each photo to set it as the default.
4. Organization Settings
A new page at "Settings" → "Organization" → "Information" lets you configure basic information about your business.
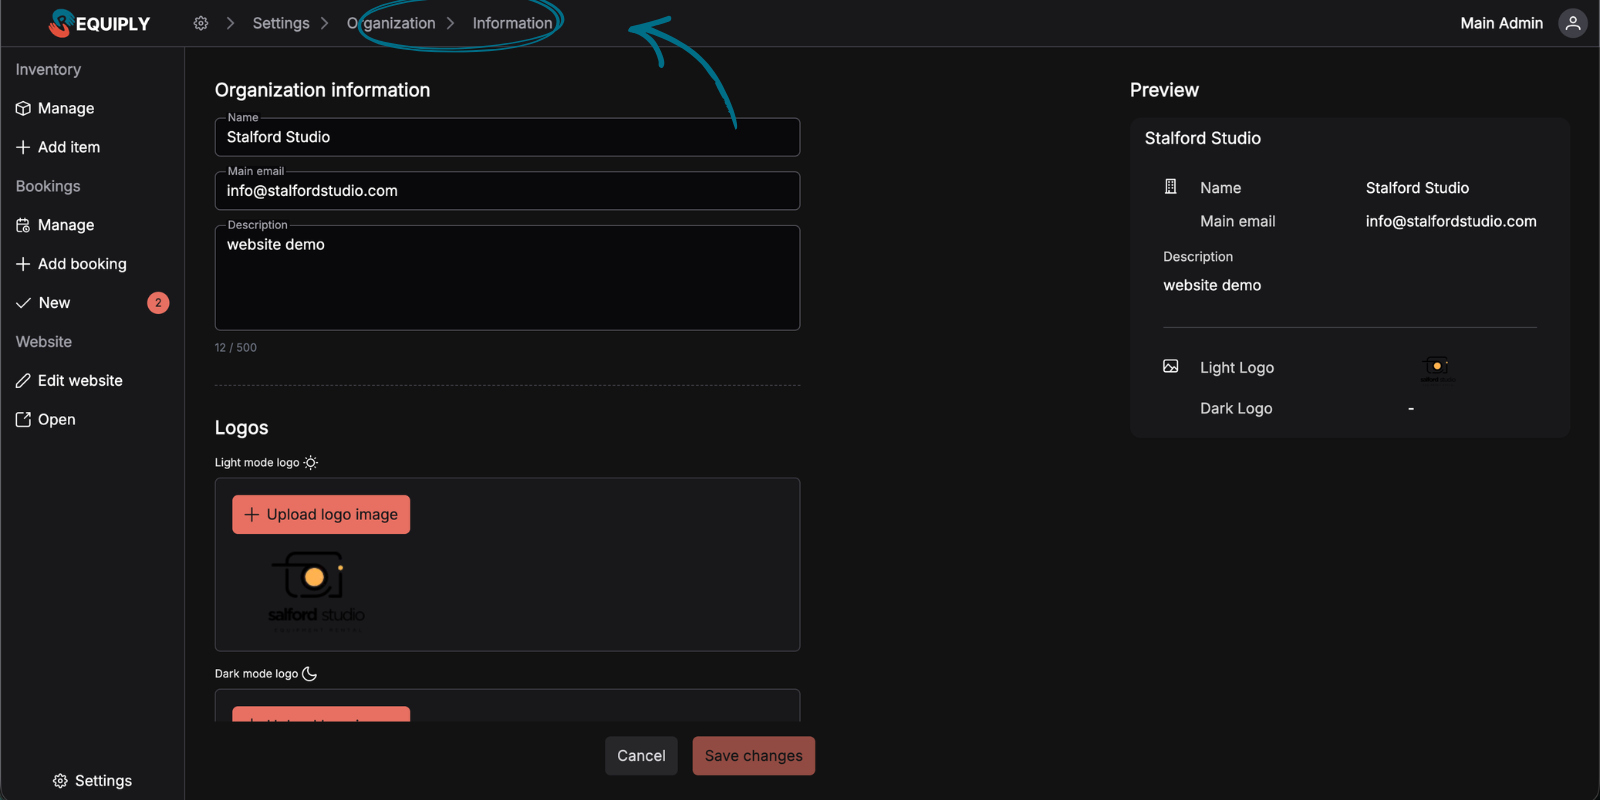
Tip: Add your logos right away — they'll automatically appear in invoices and on your website if you're using the Requiply Website Builder.
What's Next?
Based on your requests, we're already working on two major directions:
- Finances & Analytics — detailed statistics on bookings, revenue, and inventory utilization
- Services — ability to add not just physical products, but services (delivery, setup, consultation) to your bookings
Your feedback shapes what we build next. What would make Requiply even more useful for your rental business?
Questions or suggestions? Email us at info@requiply.com — we're always happy to hear from you!