


Step-by-step guide for setting up the Vchasno integration in Requiply. After completing the setup, you can send rental agreements, handover acts, and invoices for a qualified electronic signature (КЕП) without leaving the booking they belong to.
Requiply already turns every booking into paperwork: the invoice, plus any document you designed as an export template. Until now those were downloads — someone exported the agreement, emailed it, and chased a signed scan back. With Vchasno.EDO connected, the loop closes inside Requiply: save the document to the booking, send it for signing, and watch the status change on the booking card.
Inside Requiply, the integration works like this: you add your Vchasno API token once, save a generated PDF to a booking, and send it to the client's company. The document appears in your Vchasno cabinet, your side signs first, and the counterparty signs from theirs.
Requiply is listed among the official integrations on the Vchasno integrations page. Click Більше рішень (More solutions) there to reveal the Requiply card.
Step 1: Prepare Your Vchasno Account
Before configuring Requiply, make sure you have access to your Vchasno.EDO cabinet and can create an API token. If you do not have an account yet, register one first and complete the company setup.
In your cabinet, open the integration settings and create an API token. Vchasno documents that flow screen by screen in their own guide:
- Формування токенів Вчасно.ЕДО — Vchasno's step-by-step token guide (in Ukrainian, with screenshots)
Only an employee with administrator rights can create a token. If the token section is missing in your cabinet, ask whoever administers your Vchasno company to issue it, or to grant you administrator rights first.
For the integration you need:
- An API token from your Vchasno company
- An active Integration plan on that company — a paid add-on to your Vchasno plan, with a free 30-day trial available (see Step 2)
- The EDRPOU or RNOKPP (IPN) code of each client company you plan to send documents to
Keep the token private. It allows Requiply to upload documents into your Vchasno cabinet.
Step 2: Configure Vchasno in Requiply
Log in to your Requiply profile:
After logging in, open the Document signing integrations page:
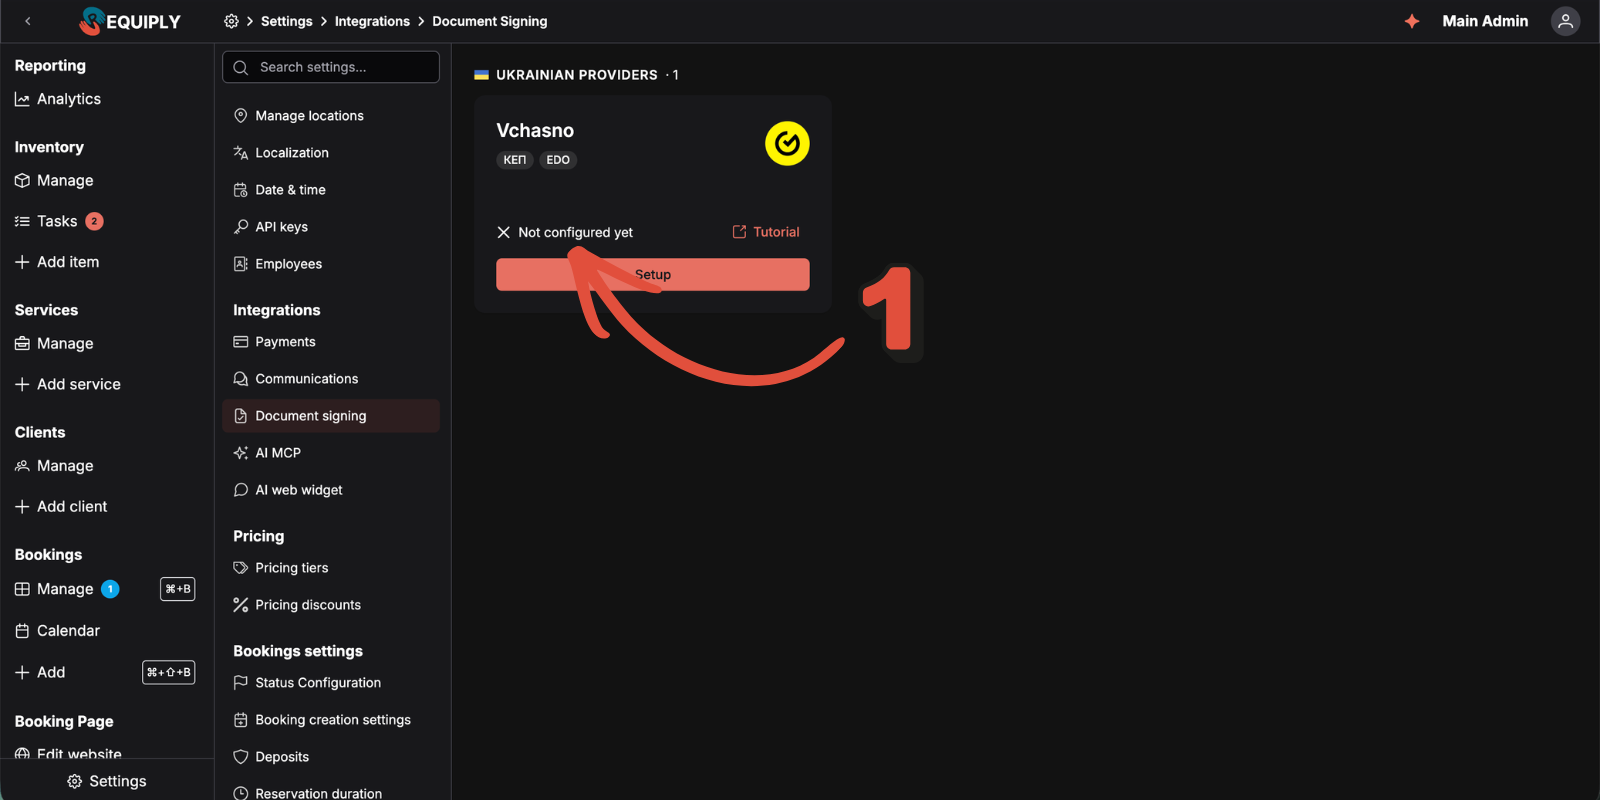
Then complete these steps:
1. Click "Setup" on the Vchasno integration card
Vchasno is listed under Ukrainian providers, tagged КЕП and EDO, and reads Not configured yet until you connect it.
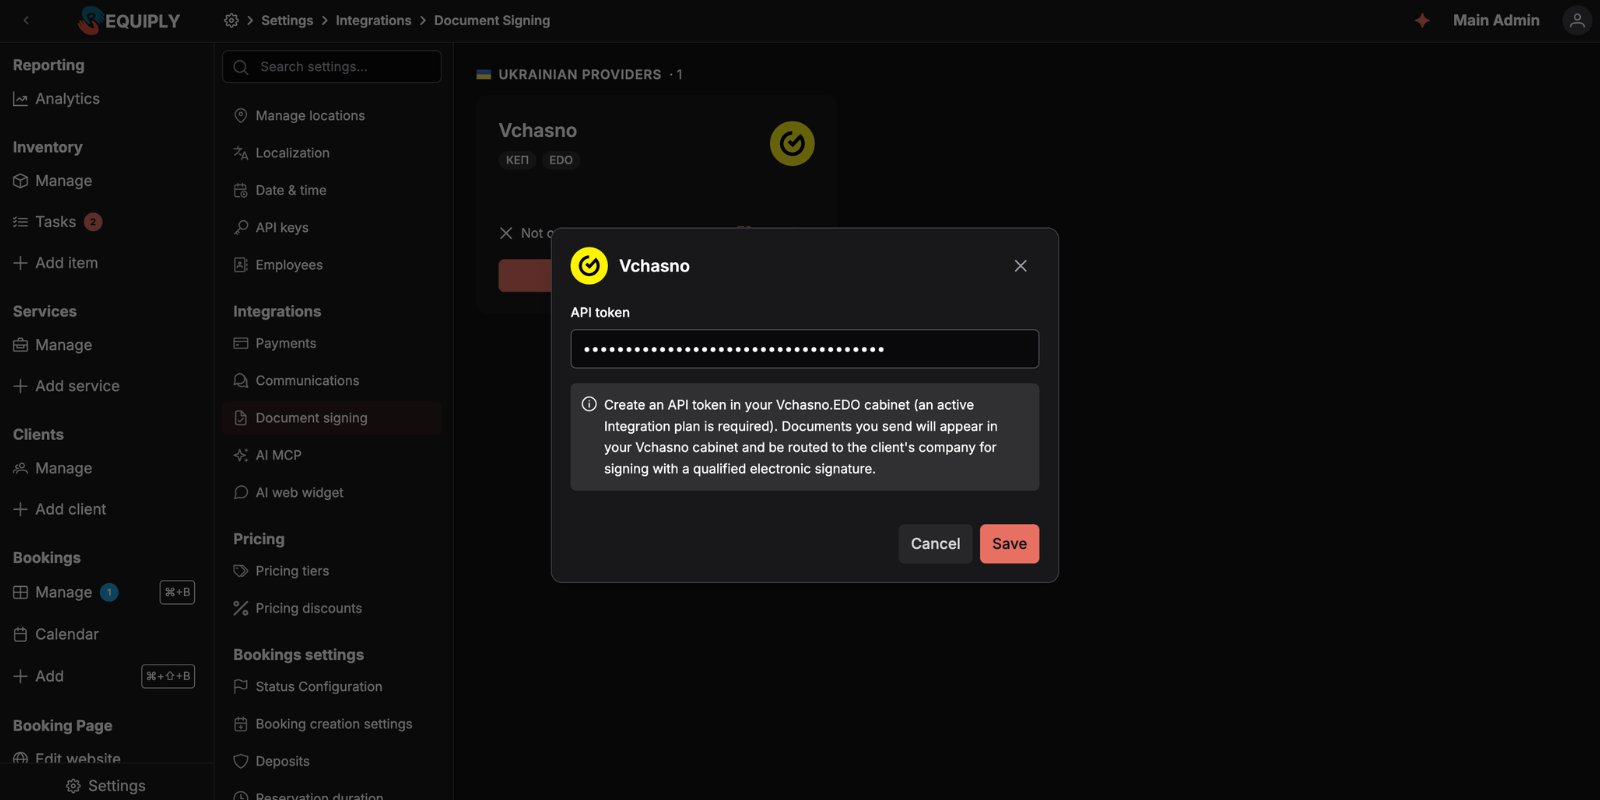
2. Paste the API token
The dialog has a single field — API token. Paste the value from your Vchasno cabinet and click Save. The note under the field repeats the two prerequisites: the token comes from your Vchasno.EDO cabinet, and that cabinet needs an active Integration plan.
Requiply verifies the token with Vchasno before storing anything, so an invalid token never gets saved.
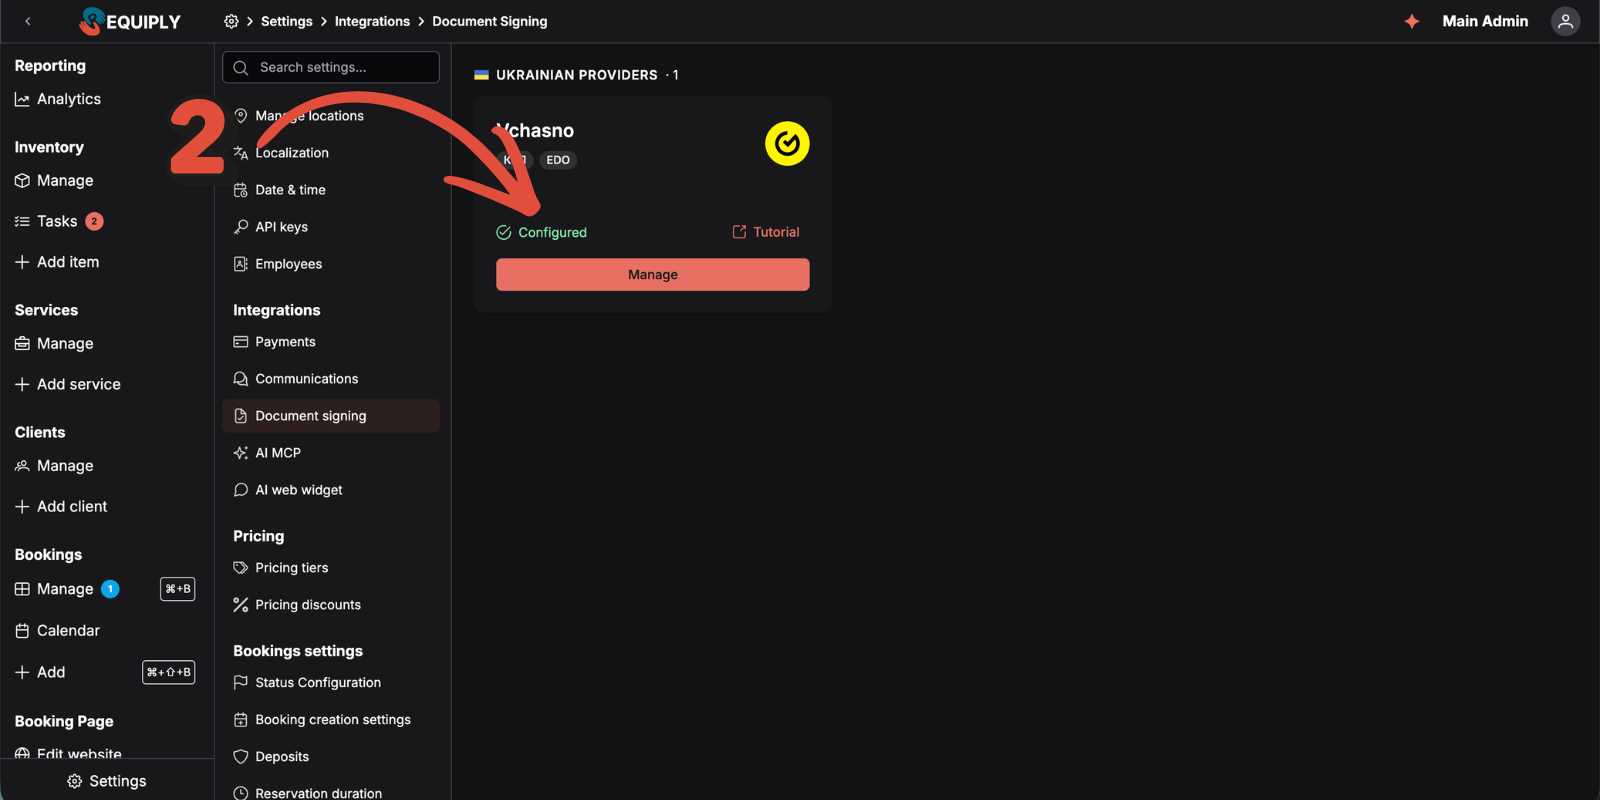
3. Check that the integration is saved
The card switches to Configured, its button becomes Manage, and signing buttons appear on booking documents.
The Vchasno API works only on the Integration plan. If your Vchasno company is not on it, Requiply offers to activate Vchasno's free 30-day trial for you when you save the token — Vchasno grants that trial once per company, and the 30 days start immediately. To keep using the Vchasno integration with Requiply after the trial, the Integration plan is a paid add-on on top of your existing Vchasno plan.
Step 3: Prepare the Document You Want Signed
Any PDF Requiply generates from a booking can be signed — the invoice, or a document of your own design.
For contracts and acts, create the document first:
A rental agreement or a handover act built there is filled in with real booking data — dates, equipment, totals, client details — every time it is generated. Nothing extra needs to be configured for signing: the same template you already use for printing is the one you will send.
Step 4: Save a Document to the Booking
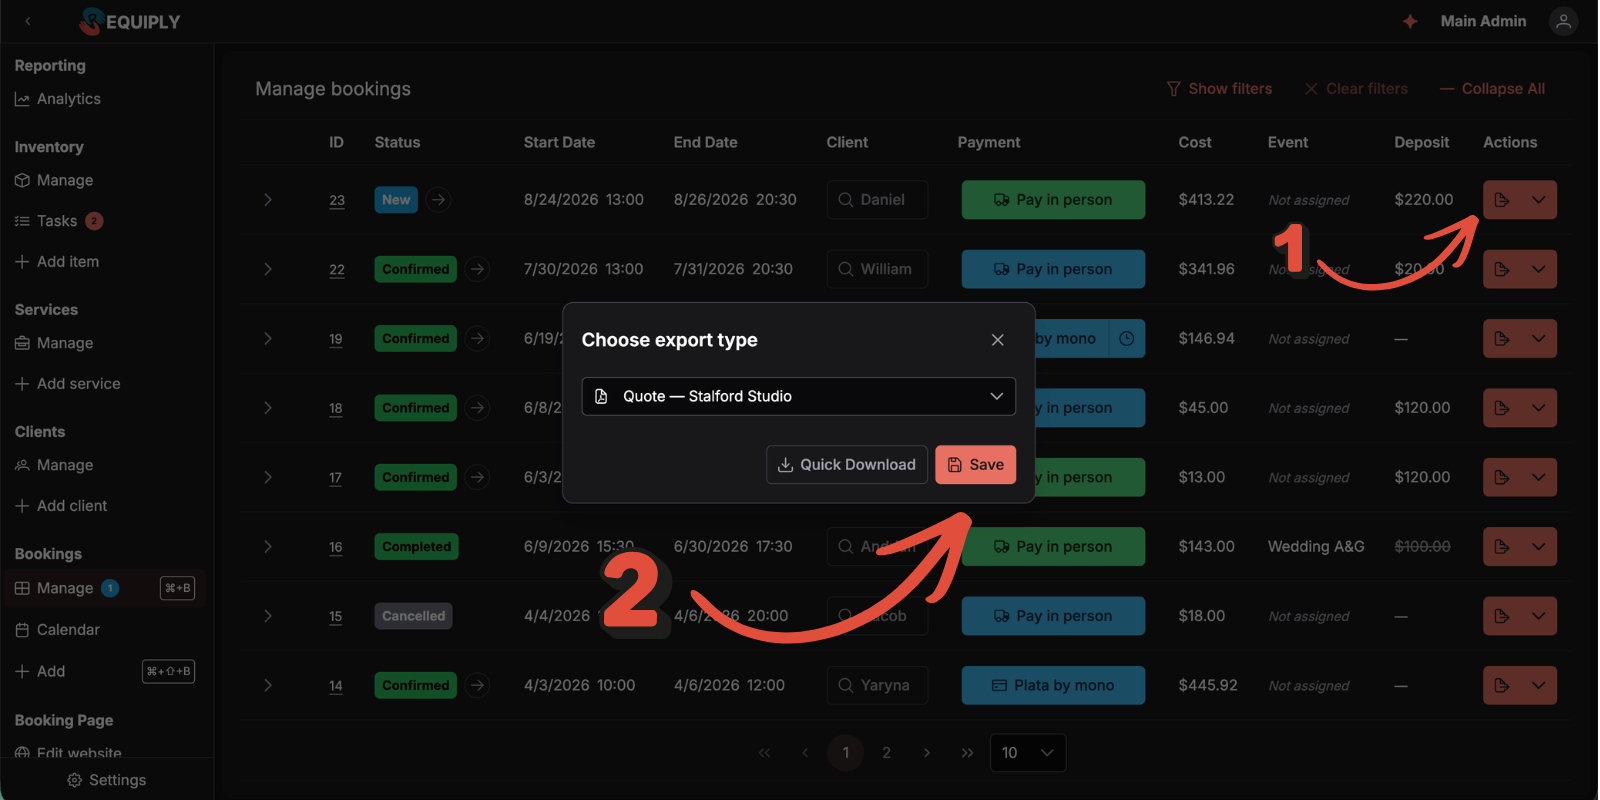
Open Manage bookings and click Export in the row's Actions column — or Export in the top-right corner of the booking's own page.
The Choose export type dialog lists PDF Invoice first, followed by your export templates. Pick one, then choose how to produce it:
| Button | What it does |
|---|---|
| Quick Download | Generates the PDF and downloads it. Nothing is stored. |
| Save | Generates the PDF, stores it on the booking, and opens the booking with the new document highlighted. |
Click Save.
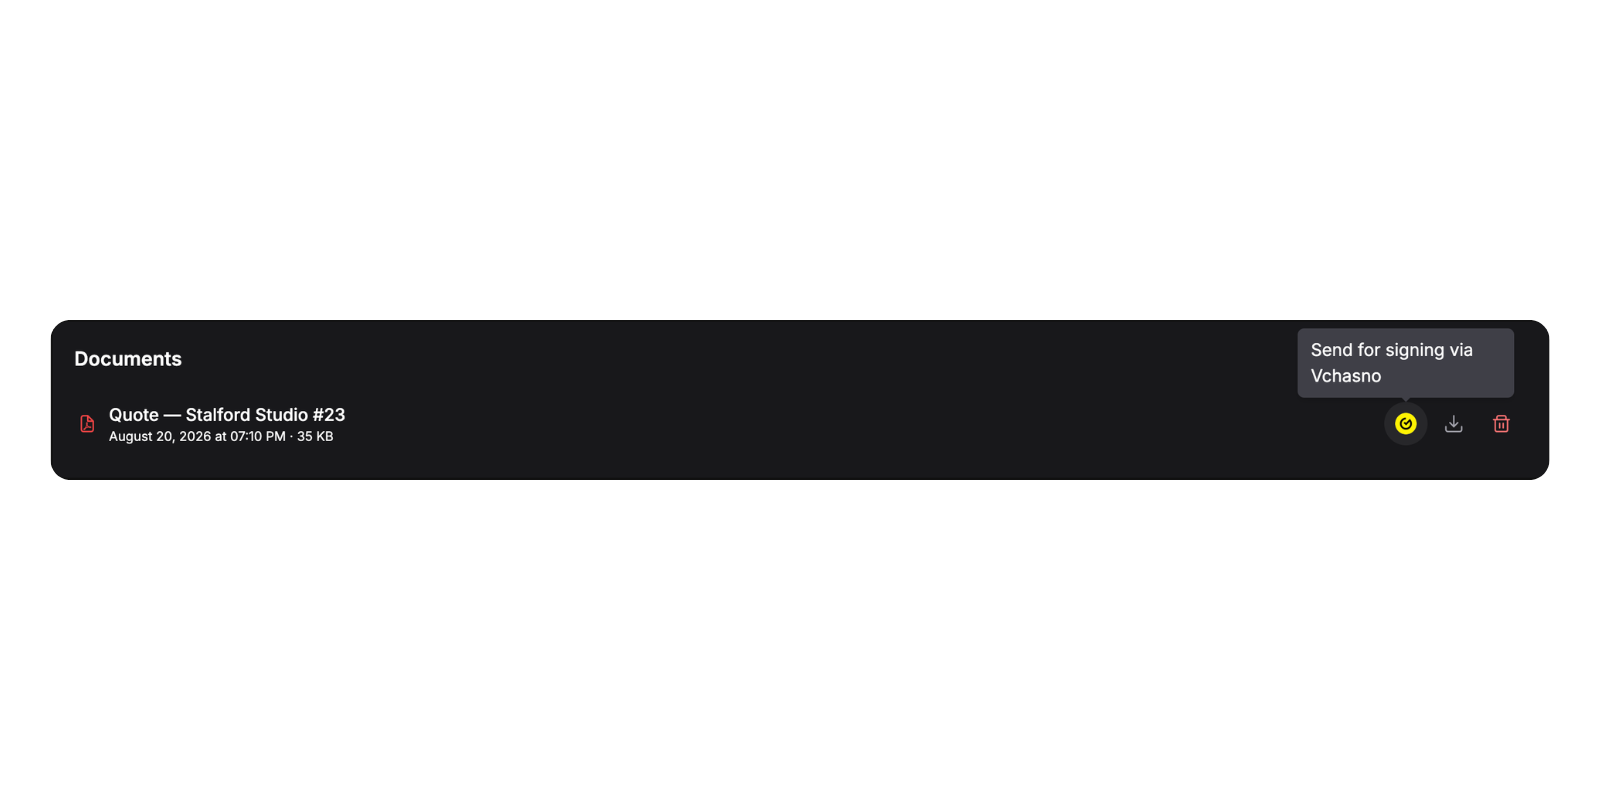
The document now lives on the booking's Documents card, named after what produced it and the booking number — for example Quote — Stalford Studio #23 — with the date it was generated and its file size underneath.
Three actions sit on the row: the yellow Vchasno button (Send for signing via Vchasno), Download, and delete. The Vchasno button only appears because the integration is connected.
Step 5: Send the Document for Signing
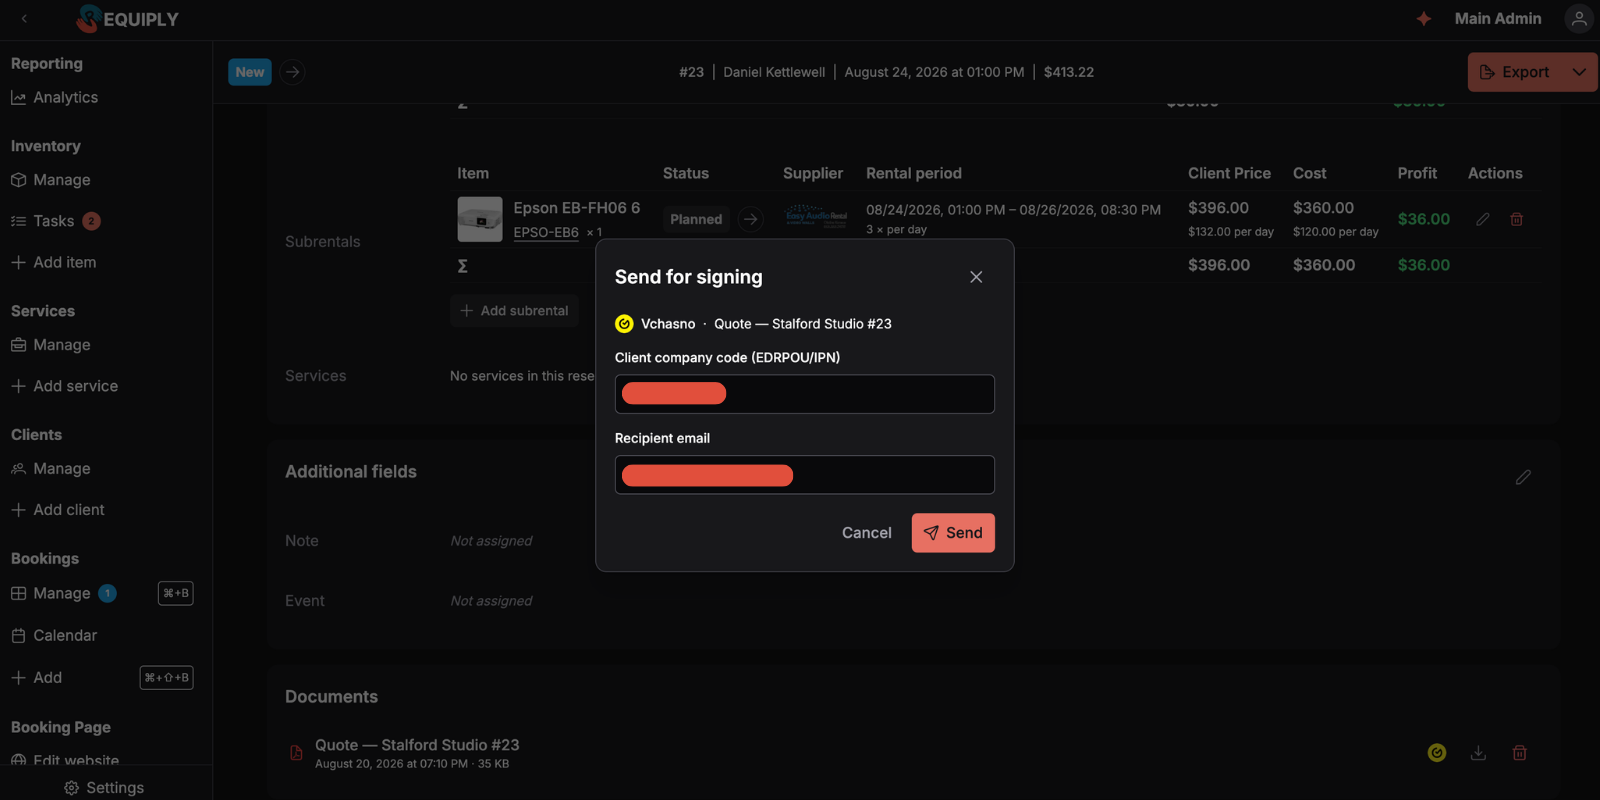
On the Documents card, click the Vchasno button next to the document. The dialog names the provider and the document being sent, and asks for two things:
| Field | What to enter |
|---|---|
| Client company code (EDRPOU/IPN) | The counterparty's EDRPOU (8 digits) or IPN / RNOKPP (10 digits) |
| Recipient email | Prefilled with the booking client's email; the address Vchasno notifies |
Click Send. Requiply uploads the PDF to Vchasno and routes it to that company.
Your organization signs first: open the document in your Vchasno cabinet and sign it with your КЕП. After that it moves to the client, who signs from their own cabinet.
Step 6: Track the Signing Status
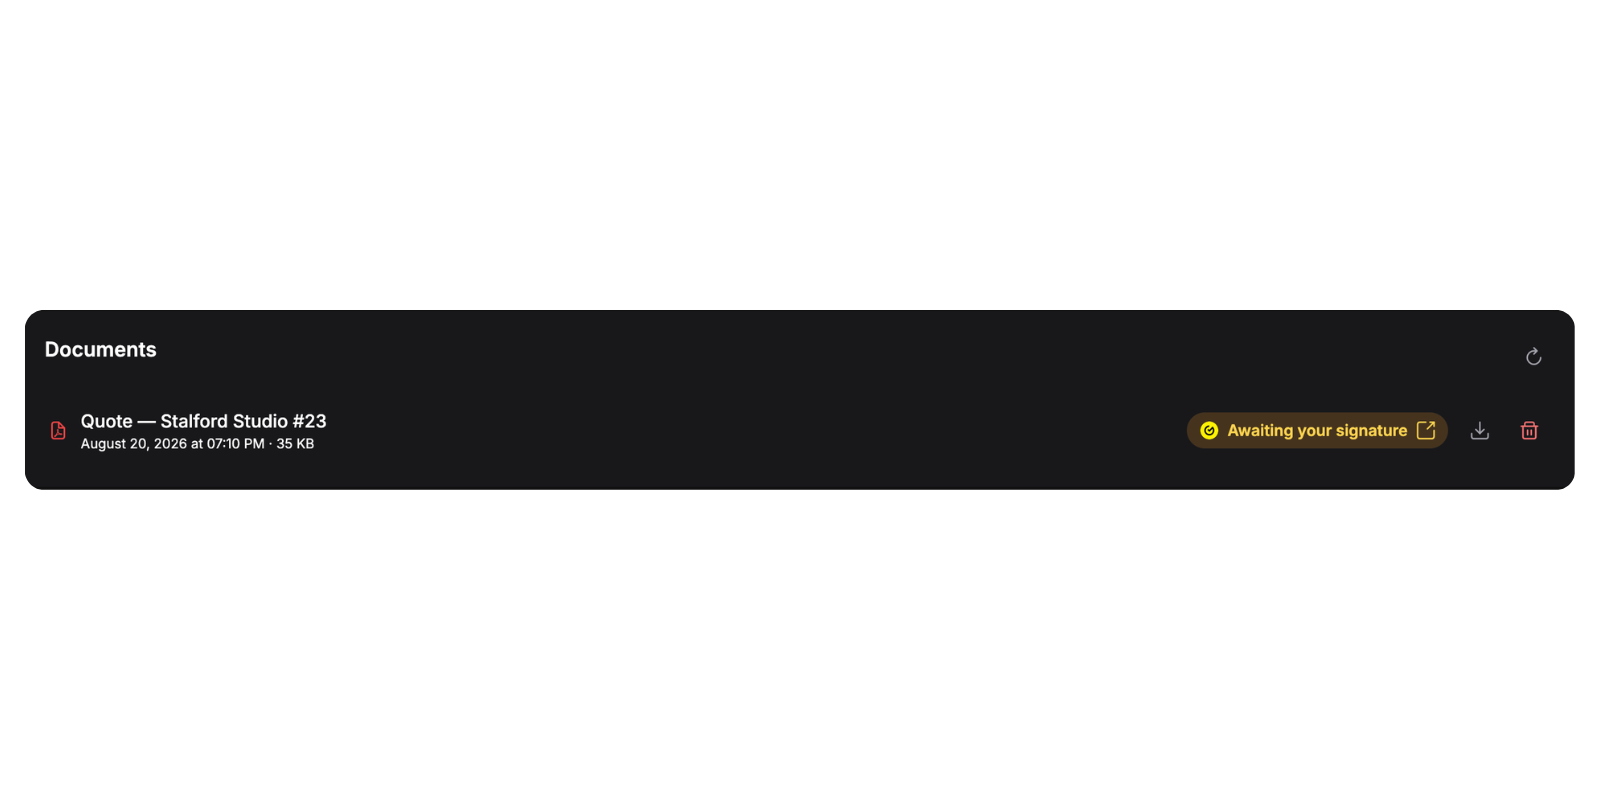
Once a document has been sent, its row changes: the send button is replaced by a status chip with the Vchasno mark, and a refresh icon appears in the card header. Because your side signs first, the chip reads Awaiting your signature until you sign it in the Vchasno cabinet — clicking the chip takes you straight there. Refresh re-checks everything that is still in progress.
| Status | Meaning |
|---|---|
| Sent | Uploaded to Vchasno; no signing state reported yet |
| Awaiting your signature | Waiting for your organization to sign in the cabinet |
| Awaiting client | Your side is done; the client has not signed yet |
| Signed | Fully signed by both sides |
| Rejected | The counterparty declined the document |
| Error | Vchasno reported a failure for this document |
A document can only have one signing in progress at a time. Once it is sent or signed, the send button disappears — it comes back only if the signing was rejected or ended in error, so a declined agreement can be corrected and sent again while the earlier attempt stays in the history.
Congratulations! Vchasno is now ready to sign booking documents directly from Requiply.
Step 7: Typical Scenarios
1. Rental agreement before pickup
Save the agreement from the booking, send it for signing, and check the chip before handing over the gear. Whoever is at the counter can see at a glance whether the paperwork is done.
2. Handover and return acts
Generate the act at pickup and a second one at return. Both stay on the booking with their own signing history.
3. Signed invoices for corporate clients
Corporate clients who need a signed invoice get it through the same flow — save the invoice PDF and send it to their EDRPOU.
Additional Information
- Who can set this up:
Only organization admins can connect or replace a signing provider. The token is stored encrypted and is never shown again — use Replace to rotate it. - Where documents are stored:
Saved PDFs live in private storage scoped to your organization and are downloaded through short-lived links. They are never publicly addressable. - Deleting documents:
Deleting a document in Requiply does not withdraw it from Vchasno. Cancel it in the cabinet as well when it should not be signed. - Client codes:
EDRPOU is 8 digits and belongs to a company; RNOKPP (IPN) is 10 digits and belongs to an individual entrepreneur or a person. - Signing order:
Documents are always routed for your signature first, then the counterparty's.
Have questions? Write to us at info@requiply.com or contact the Requiply support team.
- vchasno
- edo
- electronic signature
- documents
- integration
- contracts
- requiply