


A step-by-step guide for setting up the LiqPay integration in Requiply. After completing all the steps, you will be able to accept payments on your website and generate payment links for your bookings.
Inside Requiply, the LiqPay integration works like this: you create a booking, choose LiqPay as the payment type, and the system automatically builds a payment link with all items, prices, and the total amount. You can send this link to the client right away. When the client pays, cancels, or the payment changes status for any other reason, the booking status updates in real time without reloading the page.
Step 1: Register or log in to LiqPay
If you don't have a LiqPay account yet, register here:
If you already have an account, simply log in to your dashboard.
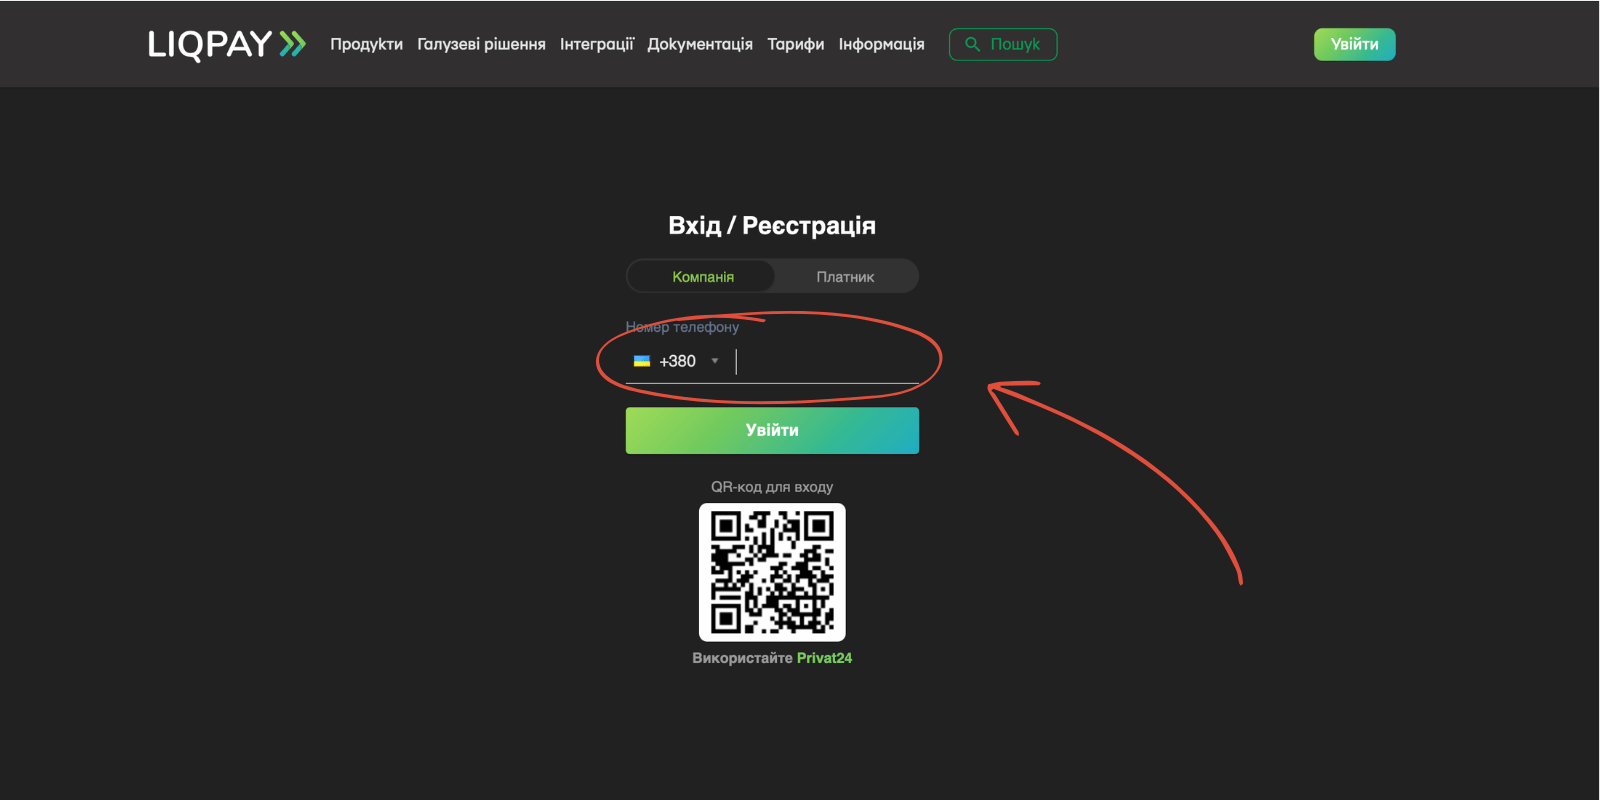
Step 2: Get the test (sandbox) keys
After logging in to the LiqPay dashboard, you can immediately use the test (sandbox) keys to verify the integration without real payments.
Go to the API keys section in the LiqPay dashboard:
1. Open the API keys section in the LiqPay dashboard
Find the keys section in your LiqPay dashboard. You will see two keys: a Public key and a Private key. Use the sandbox versions of these keys for testing.
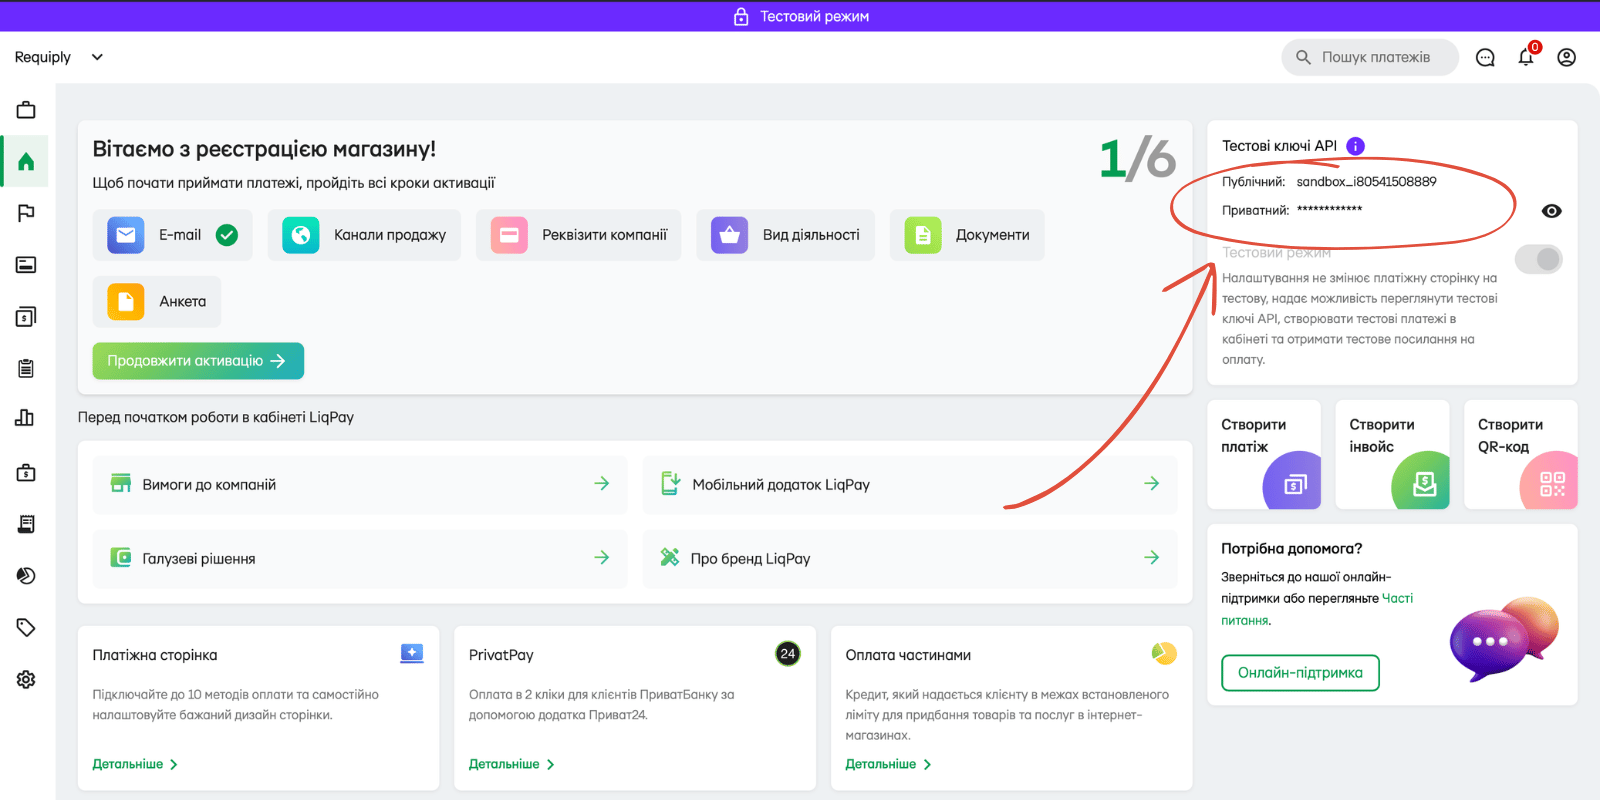
2. Copy the sandbox Public key and Private key
Copy both keys. You will need them to configure the integration in Requiply.
Step 3: Configure the integration in Requiply
Log in to your Requiply profile:
After signing in, go to the payment integrations settings page:
Then complete the following steps:
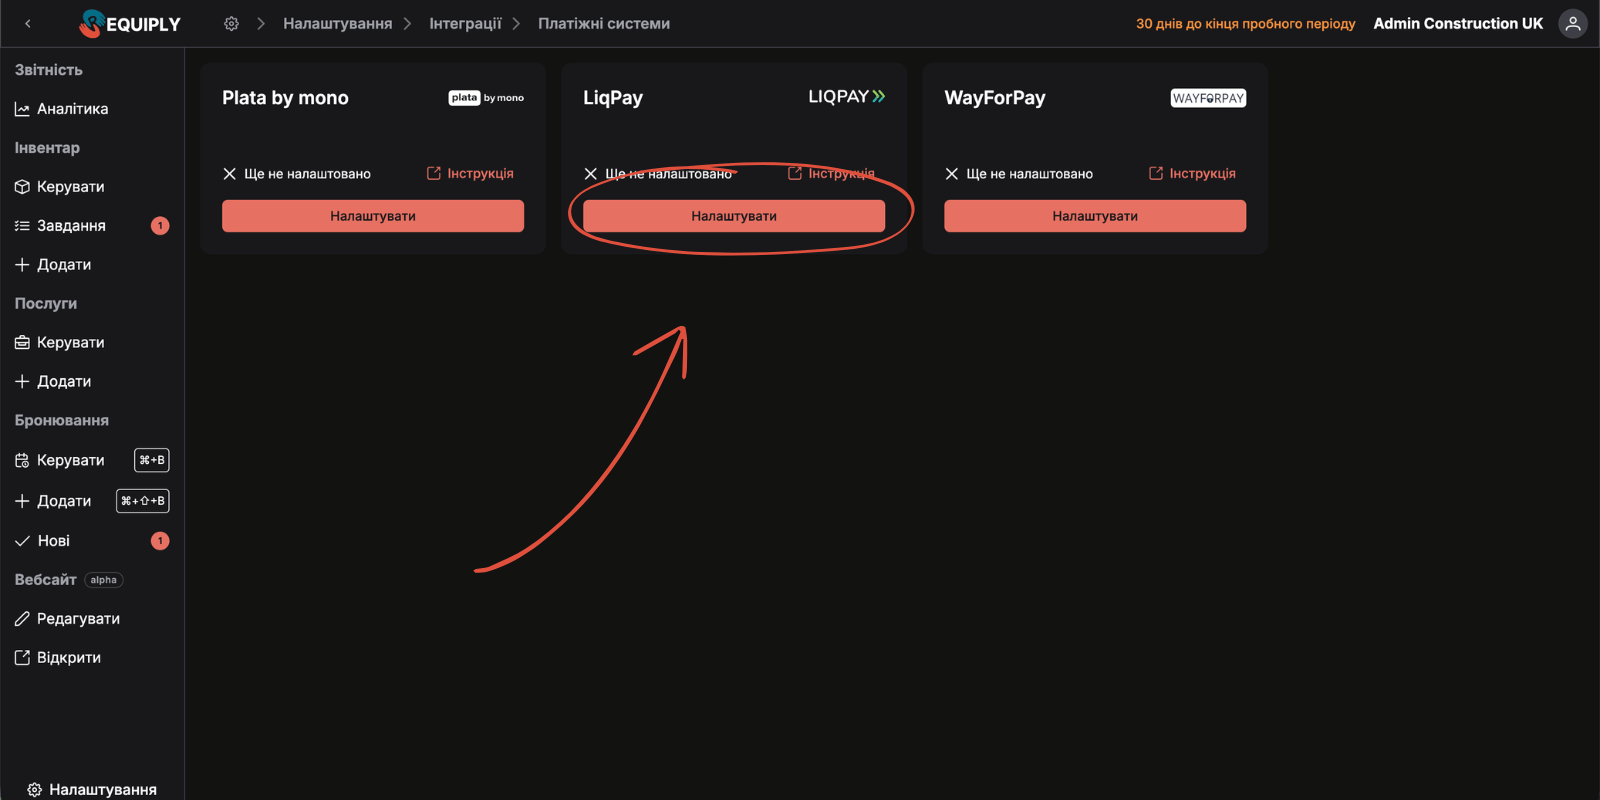
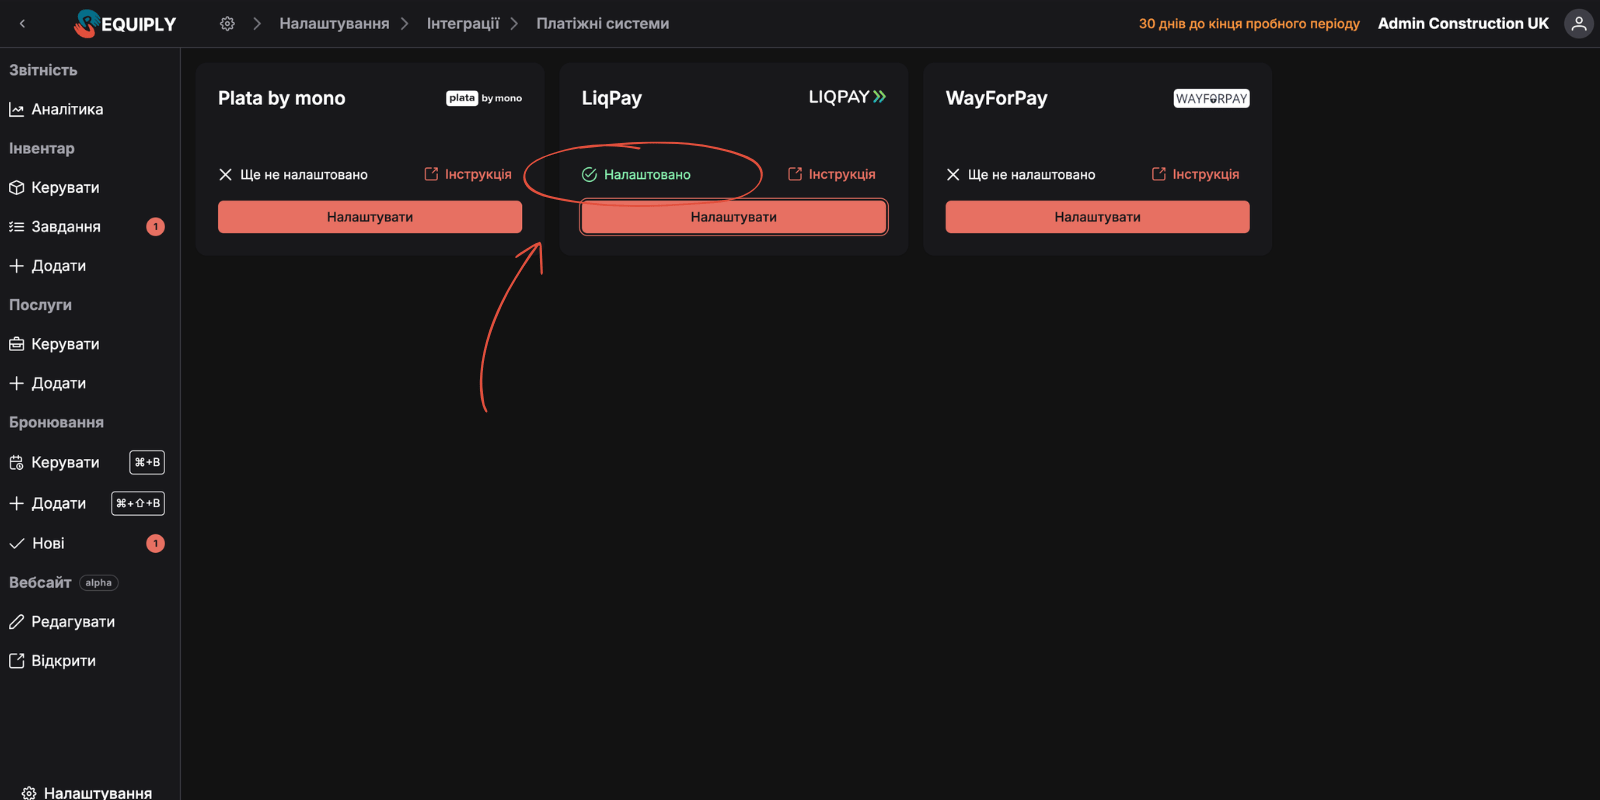
1. Click the "Configure" option on the "LiqPay" integration card
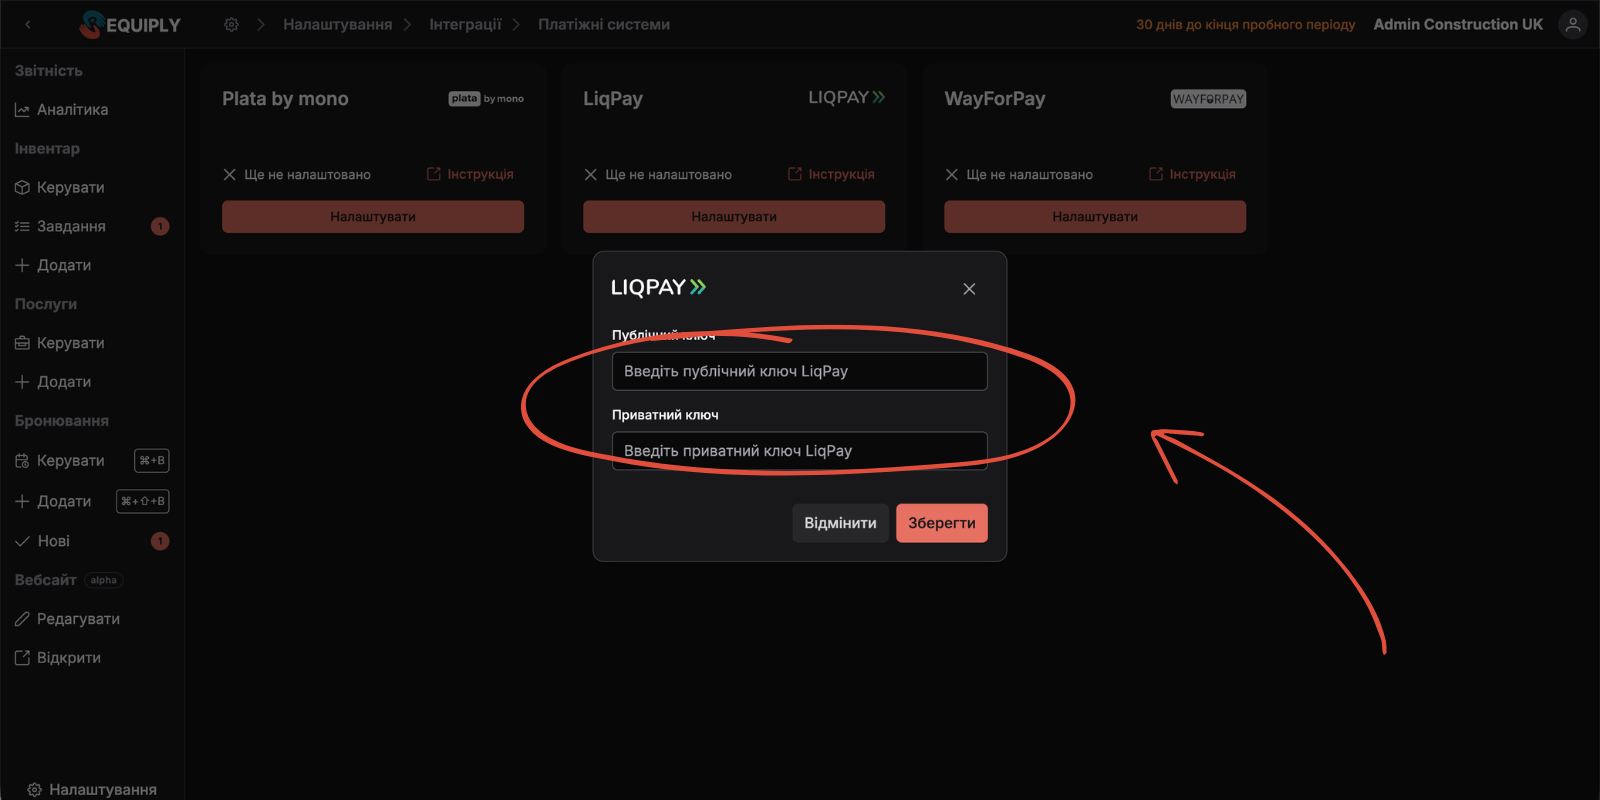
2. Paste the copied Public key and Private key and click the "Save" button
If an error appears, your keys are incorrect. Contact support or try generating new keys in the LiqPay dashboard.
3. Verify the integration succeeded
If everything is configured correctly, you will see a successful connection status.
Step 4: Enable "LiqPay" for your website
Go to the Requiply website settings page and open the payments tab:
Enable "LiqPay" (No. 1 on the screenshot), expand the actions menu, and save the changes (No. 2 on the screenshot).
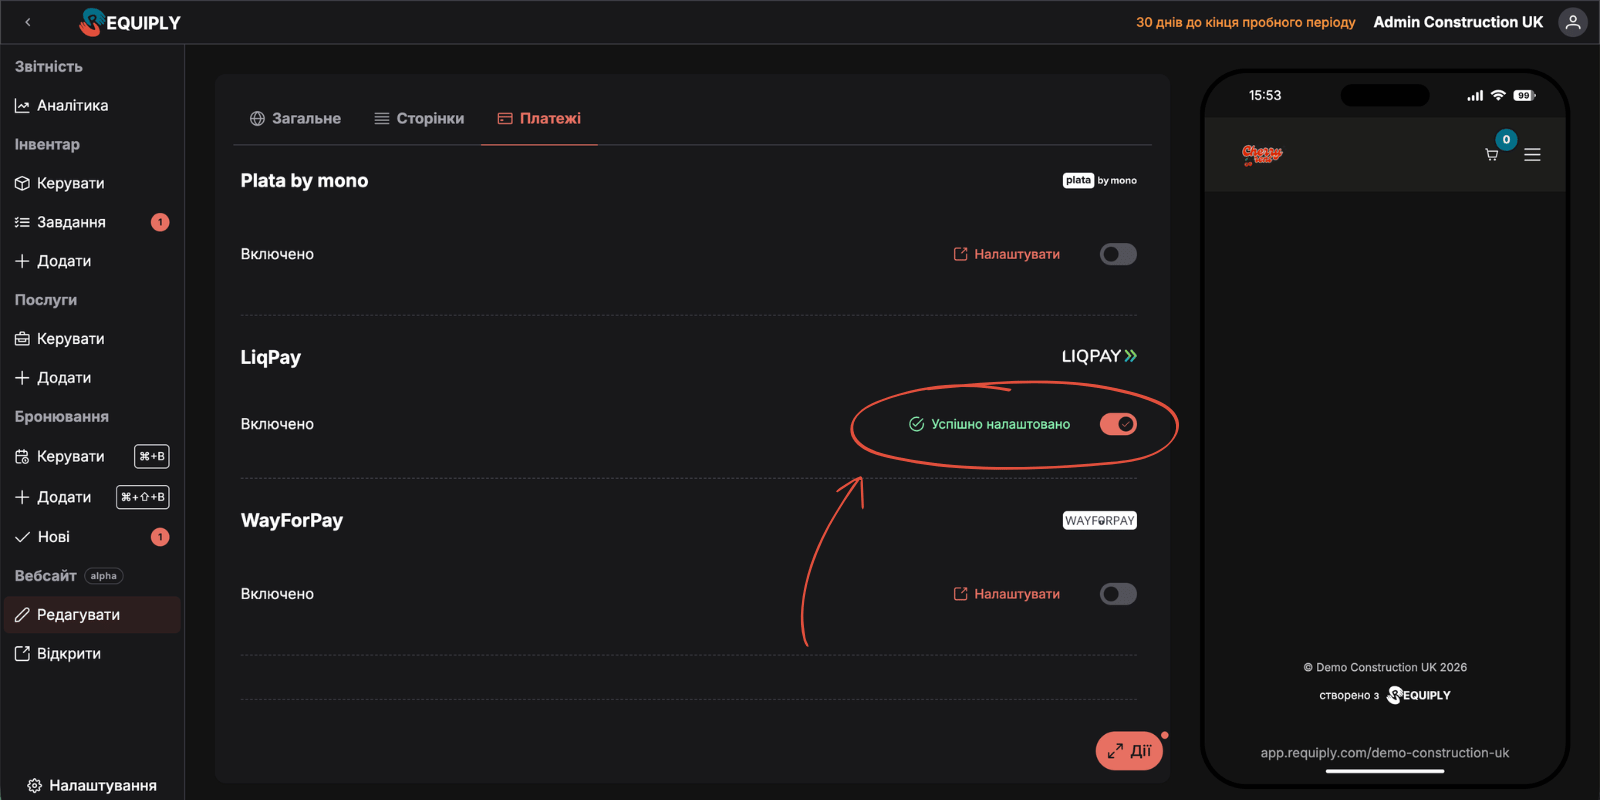
Congratulations! The test LiqPay integration is now fully configured. Your clients can pay for bookings on your website, and you can create bookings with the "LiqPay" payment type to generate payment links.
Step 5: Going to production
To accept real payments, you need to complete the full setup of your account in the LiqPay dashboard:
- Complete your business verification in the LiqPay dashboard.
- Obtain the production keys (Public key and Private key).
- In Requiply, go to the payment integrations settings page.
- Replace the test keys with the production keys and save the changes.
Replacing the keys is identical to Step 3. Simply enter the new production keys instead of the sandbox keys.
After that, you can accept real payments from your clients.
Additional information:
- Updating the keys: If your keys are lost or you want to change them, you can always do so on the Requiply payment integrations settings page.
- Partial use of the integration: You can disable "LiqPay" in the website settings but keep using this payment method inside Requiply to create orders and use all the integration's features.
Have questions? Write to info@requiply.com or contact our support team.
- liqpay
- integration
- payments
- acquiring
- privatbank
- requiply