


How do I invoice a rental booking in Fakturownia?
Connect your Fakturownia API token once under Settings → Integrations → E-invoicing, then open a booking and choose Issue invoice in Fakturownia from its actions menu. Requiply sends the equipment, services, prices, VAT and buyer from the booking to Fakturownia, and Fakturownia numbers the invoice, makes the PDF and, if your account has KSeF connected, sends it to KSeF.
Screenshots are in Polish. Fakturownia is a Polish invoicing app used by companies that invoice in Poland, so this guide shows Requiply and Fakturownia in Polish. The English names of every button are in the text.
The integration is in Beta: it works, and Fakturownia is verifying it at the same time.
Who This Integration Is For
If you already invoice in Fakturownia, you keep it. Numbering, templates, company details and the KSeF connection stay where they are. Requiply stops being the place you copy bookings from and does the copying for you.
If you don't use an invoicing app and want to send invoices straight to KSeF, use the KSeF integration instead. You can connect both: the booking's actions menu then lets you pick where to issue the invoice.
Step 1: Copy the API Token From Fakturownia
Log in at fakturownia.pl and open Ustawienia → API (1). On the Tokeny API page, copy the Kod autoryzacyjny API (2). If the list is empty, click Dodaj nowy Token.
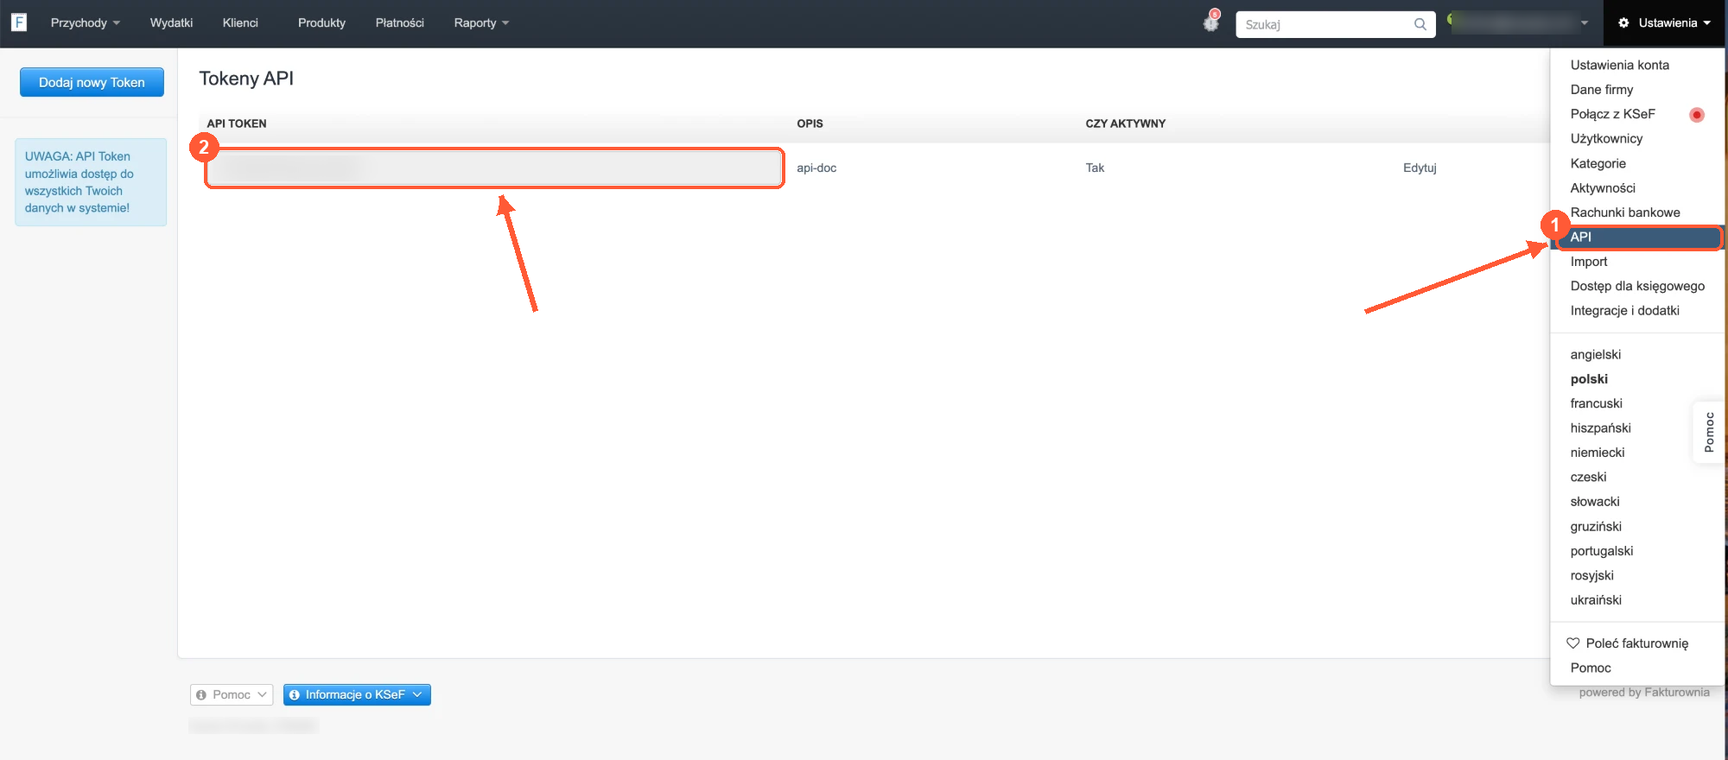
Fill in your company details in Fakturownia. Fakturownia prints them as the seller, so it can't issue an invoice without them. Check Ustawienia → Dane firmy: the name, NIP and address must be filled in. Requiply checks this before issuing and tells you if something is missing.
Step 2: Connect Fakturownia in Requiply
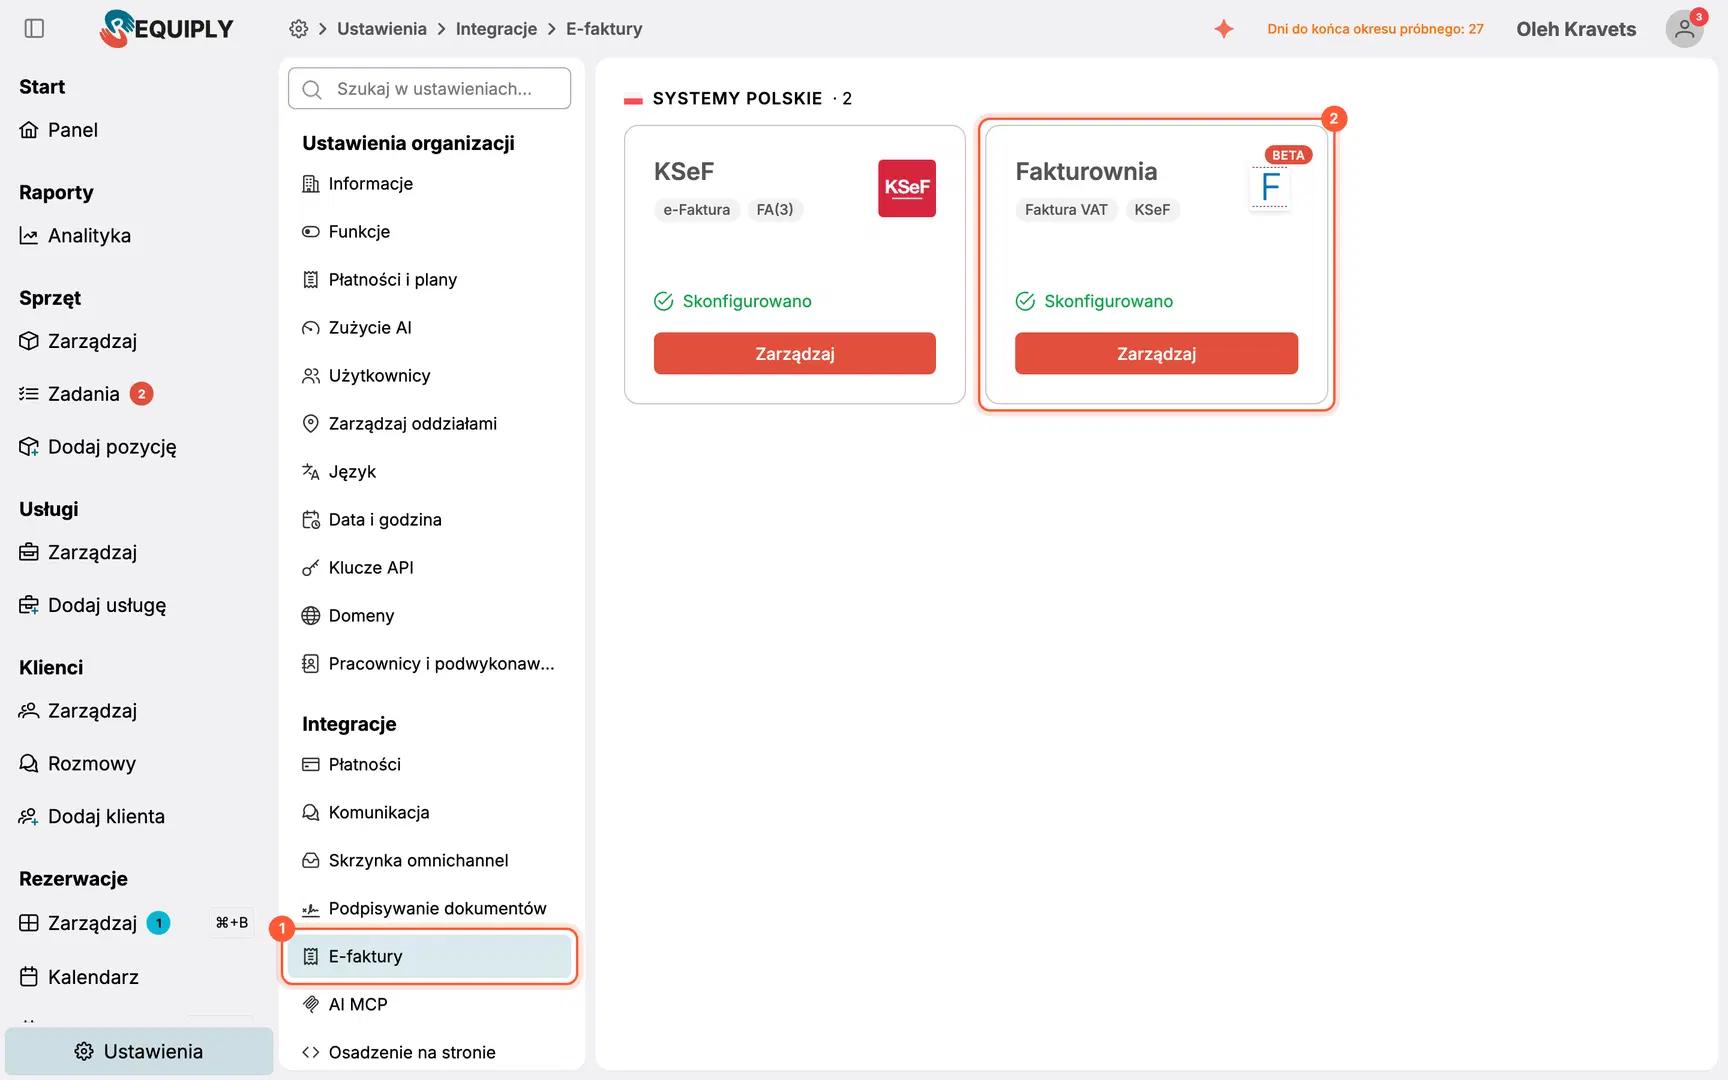
Open Settings → Integrations → E-invoicing (1) and click Setup on the Fakturownia card (2).
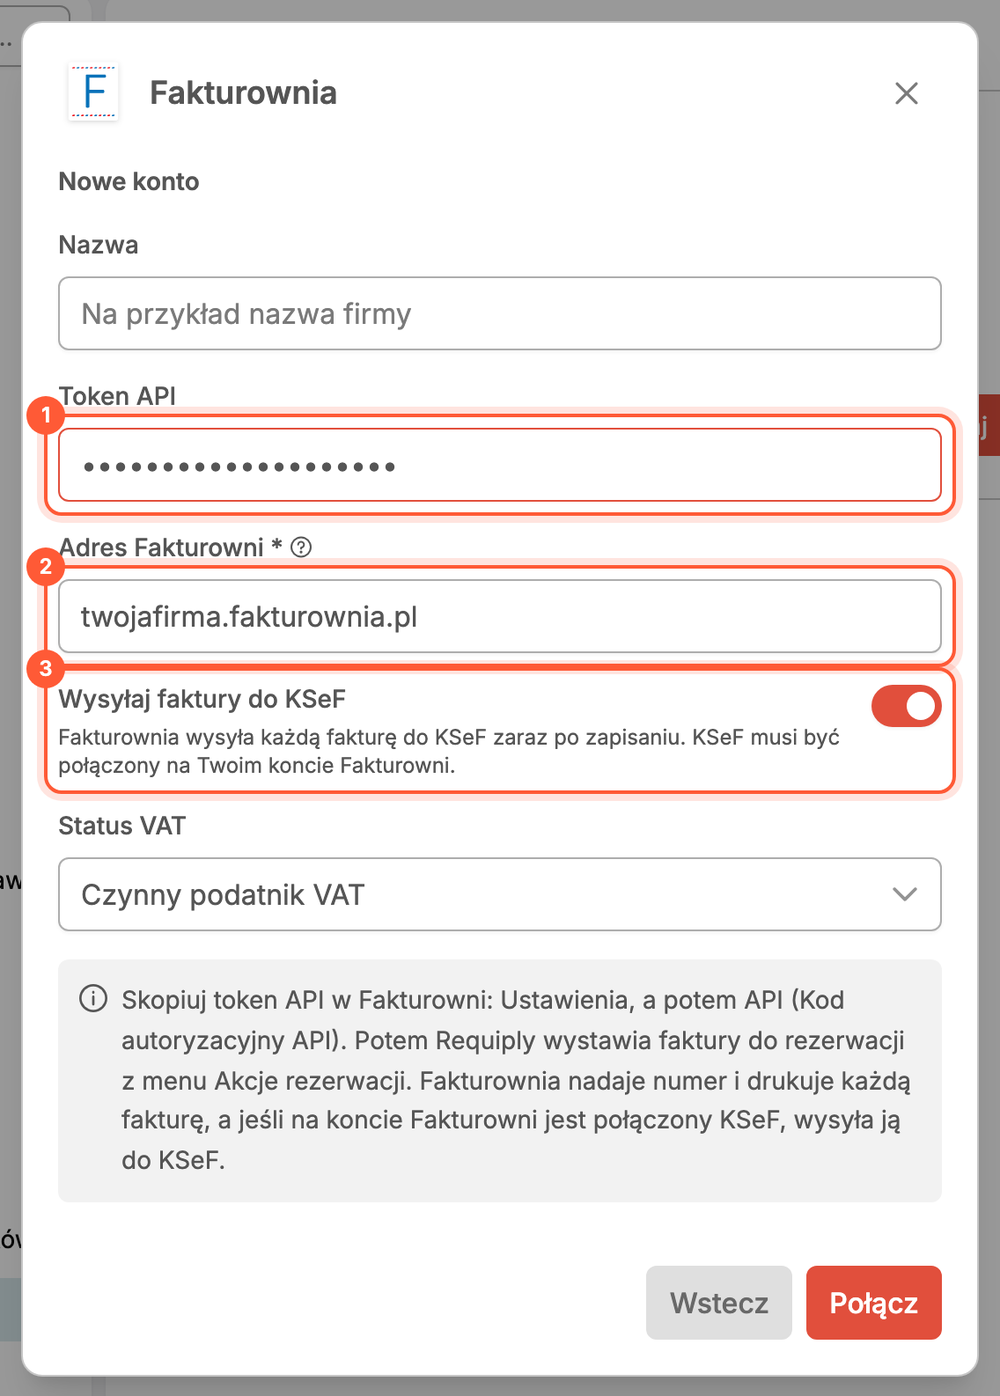
Paste the token (1), enter your Fakturownia address (2) and choose whether Fakturownia sends invoices to KSeF (3):
| Field | What to enter |
|---|---|
| API token | The API authorization code from Fakturownia |
| Fakturownia address | The address you open Fakturownia at, for example yourcompany.fakturownia.pl |
| Send invoices to KSeF | On: Fakturownia sends every invoice to KSeF right after saving it. KSeF must be connected in your Fakturownia account |
| VAT status | VAT payer, or VAT-exempt with the legal basis of the exemption |
Click Connect. Requiply checks the token with Fakturownia before saving it, so a wrong token or address is refused straight away.
VAT payers: turn VAT on under Settings → Pricing → VAT before you create the bookings you want to invoice. Bookings keep the VAT they were created with, and Requiply takes the rates for Fakturownia from it.
Step 3: Issue the Invoice From the Booking
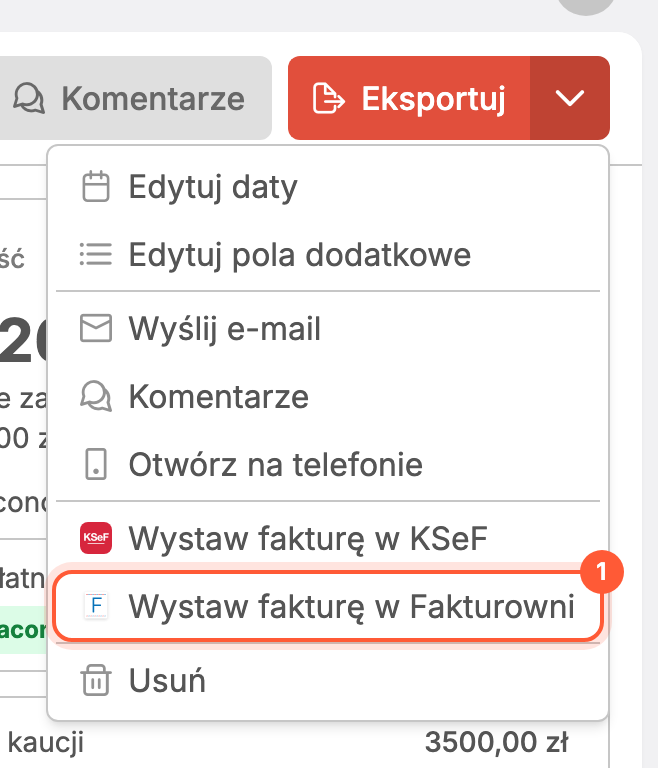
Open the booking and expand the actions menu (the arrow next to Export). You'll find Issue invoice in Fakturownia there (1).
The dialog opens with everything filled in:
- Invoice number: assigned by Fakturownia (1), following your numbering
- Buyer (2): NIP, company name and address from the client's details or from the client's last invoice. For a private person, choose Private person
- Payment: Paid when the booking is fully paid, otherwise To be paid with an optional due date
- Invoice lines: every item and service on the booking with its price, discount and VAT rate
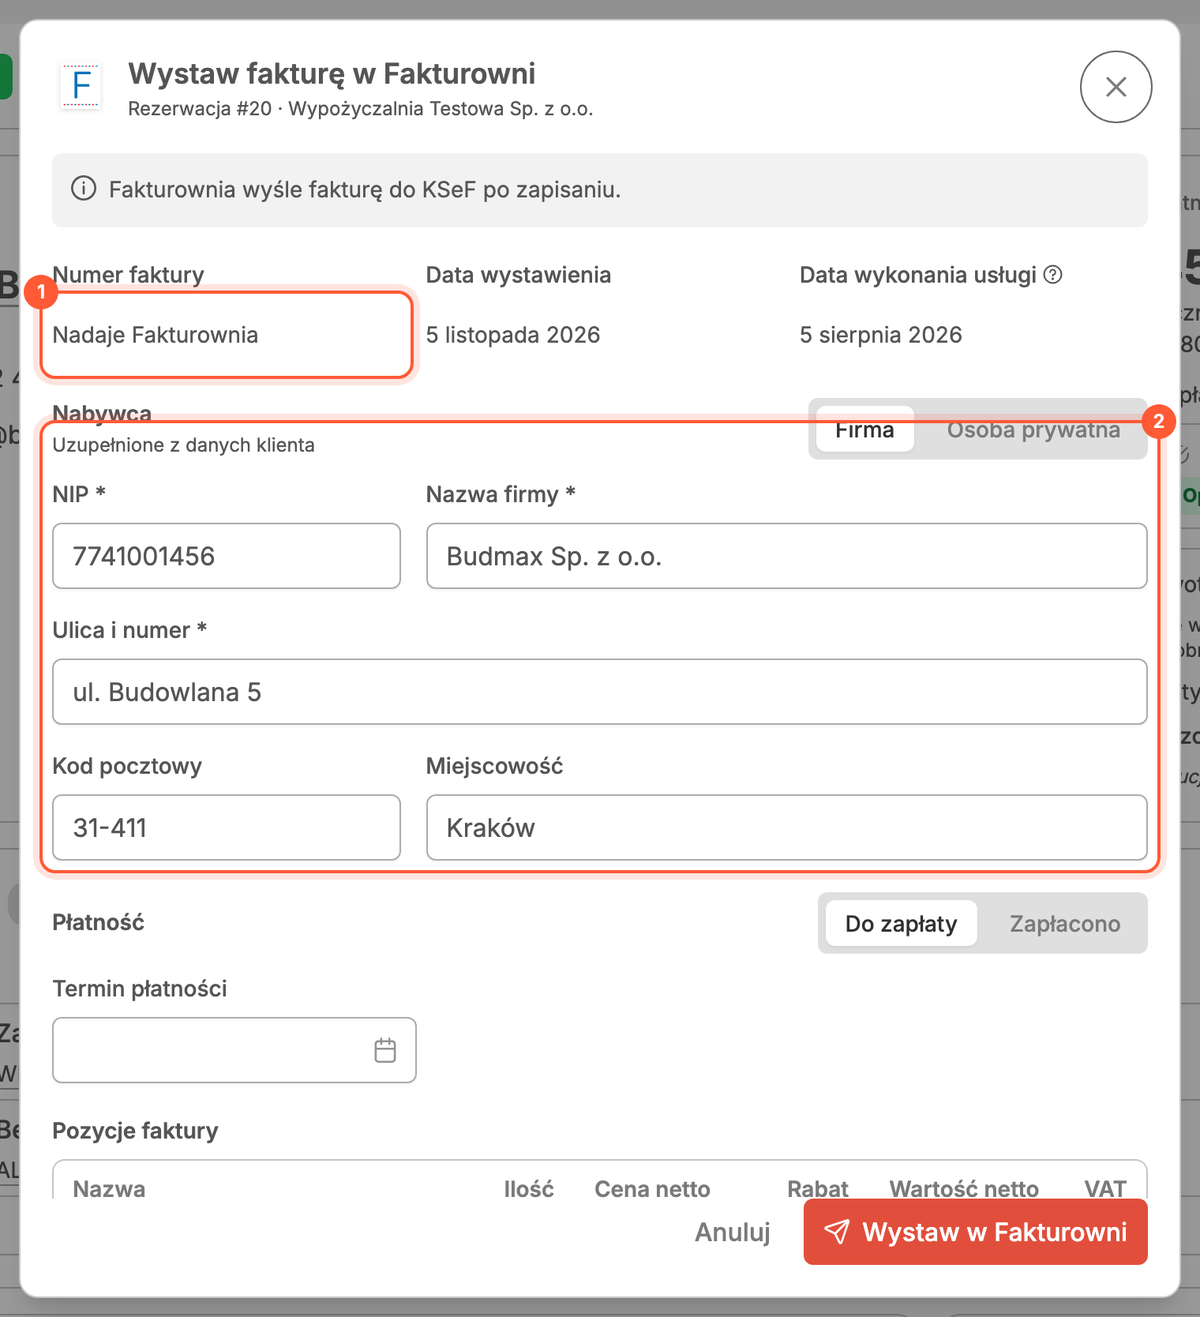
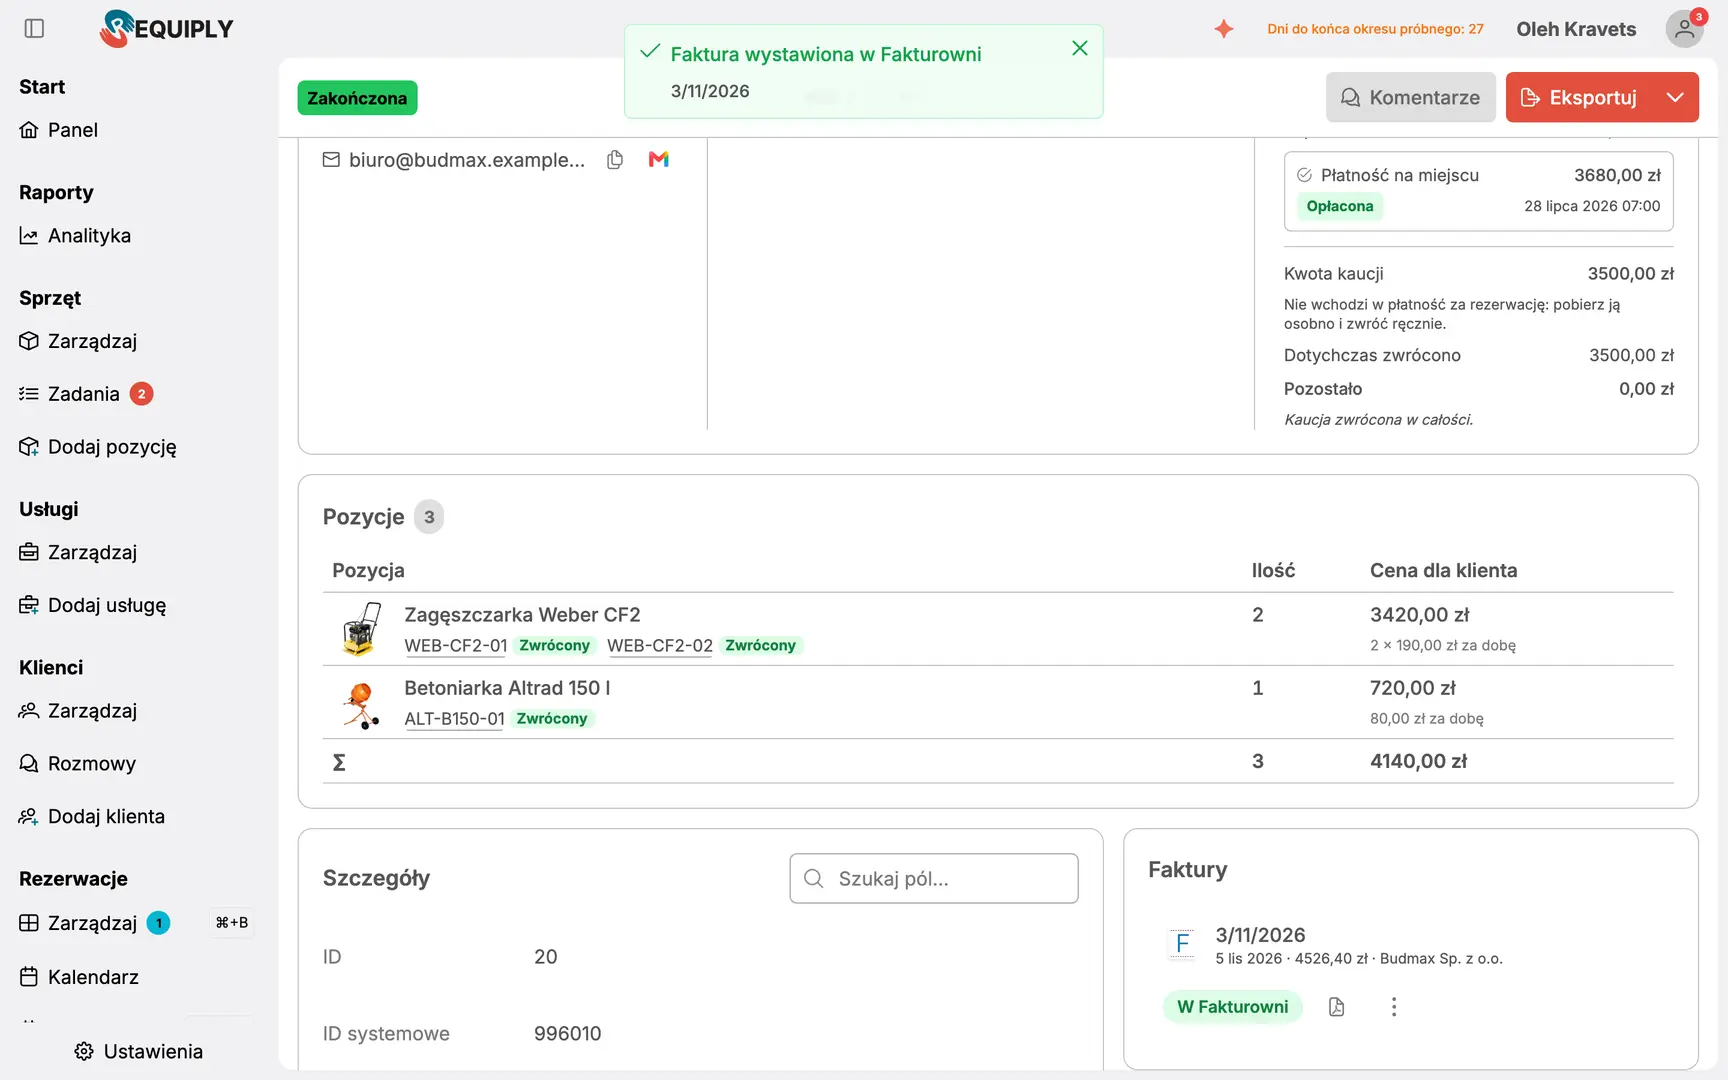
Check the buyer and click Issue in Fakturownia. A moment later Requiply shows Invoice issued in Fakturownia with the number Fakturownia assigned, and the invoice appears in the booking's Invoices section.
If something blocks the invoice, the dialog tells you before anything is sent. For example: a booking without VAT on a VAT payer account, or missing company details in Fakturownia.
Step 4: Manage the Invoice on the Booking
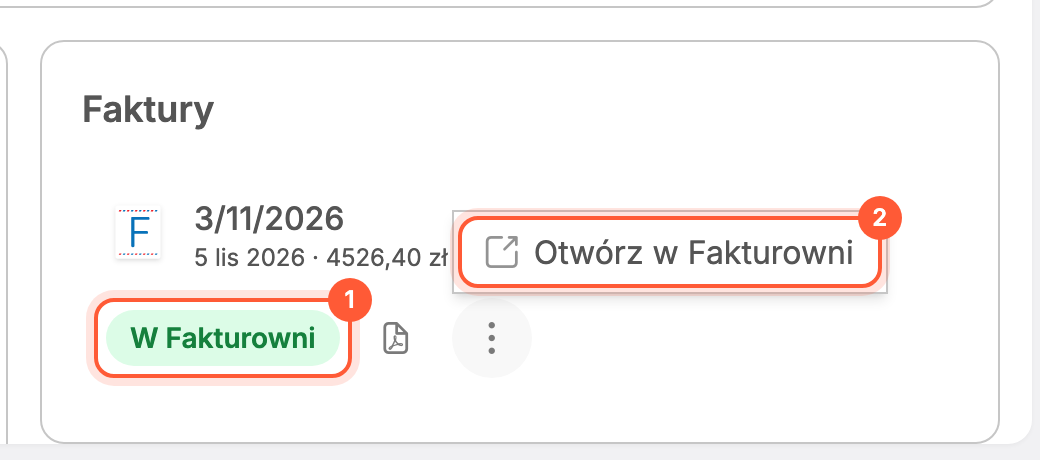
The In Fakturownia status (1) means the invoice is saved in Fakturownia. The PDF button downloads the invoice as Fakturownia prints it, and Open in Fakturownia (2) in the menu takes you to it in Fakturownia, for example to email it to the client.
When Fakturownia sends the invoice to KSeF, Requiply follows its status. Once KSeF accepts it, the invoice shows its KSeF number, and the menu adds Download UPO receipt and Download invoice XML. If KSeF rejects it, you see the reason and an Issue again button.
Client Details Fill In Themselves
Requiply now has the client system fields invoices need: NIP, Company name, Street and number, Postal code and City. When you connect Fakturownia or KSeF, Requiply offers to add these fields to clients in one click. You can also turn them on under Settings → Fields → Level configurations, on the Client tab.
With the fields on, the invoice dialog takes the buyer from them. And when a client doesn't have these details yet, Requiply saves them after the first accepted invoice: you type the NIP and address once, on the invoice, and they're ready next time. Requiply never overwrites details the client already has.
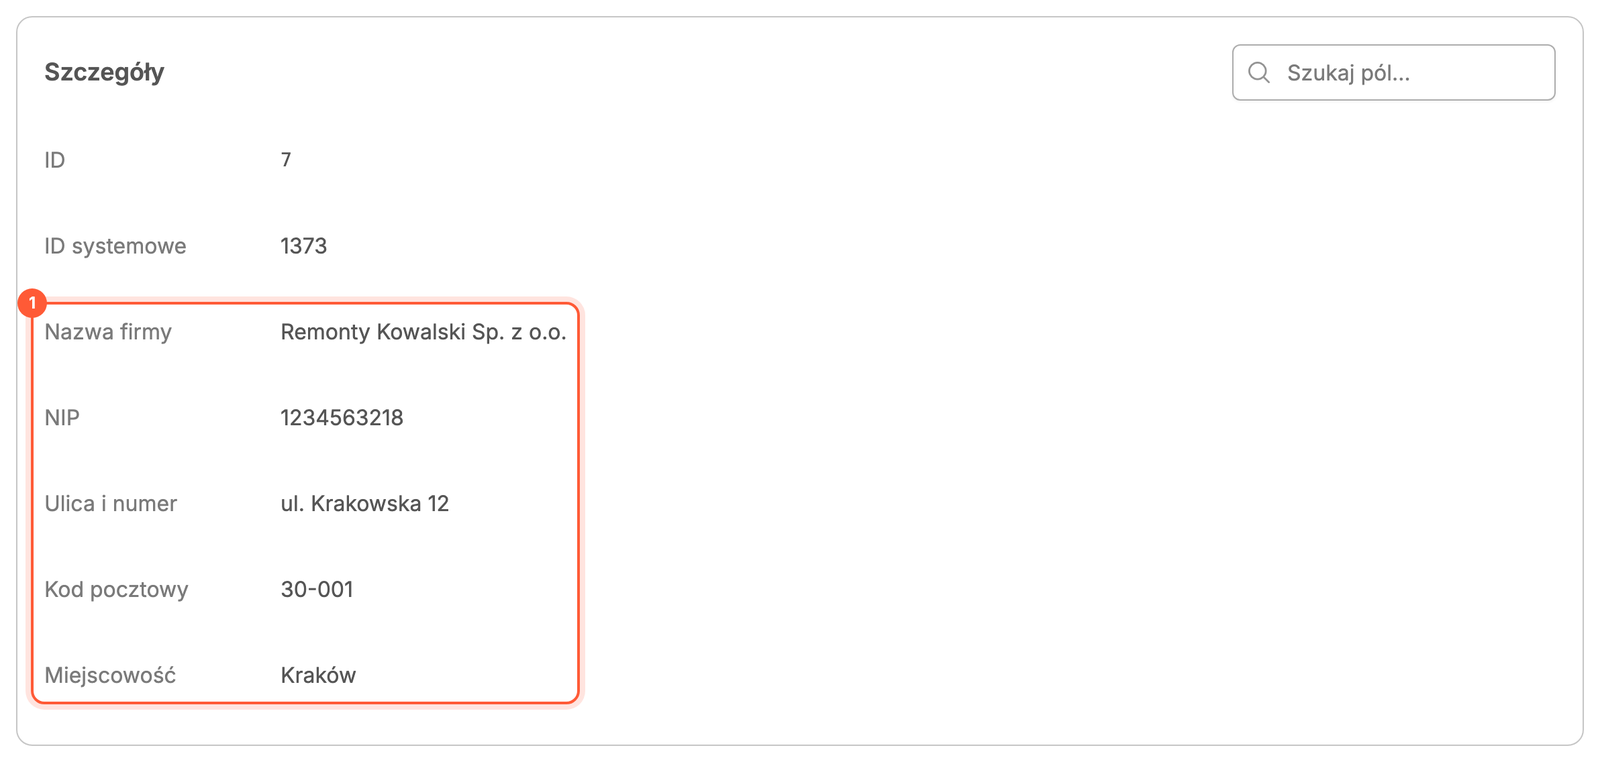
The same works with the KSeF integration.
What It Doesn't Do Yet
Requiply doesn't issue correction invoices, pro formas or advance invoices in Fakturownia yet, and it doesn't read payments back from Fakturownia. Handle those directly in Fakturownia. If KSeF rejects an invoice and you issue it again, Requiply creates a new invoice in Fakturownia, so delete the rejected one there. Need any of these? Write to us at info@requiply.com.
Frequently Asked Questions
Additional Information
- Who can set it up: organization admins connect, edit and disconnect Fakturownia accounts. Anyone who can manage bookings can issue invoices.
- Where the token is kept: Requiply stores it encrypted and never shows it again. To change it, use Replace token in the Fakturownia dialog.
- Full reference: every field, status and message is described in the knowledge base.
Questions? Write to us at info@requiply.com or book a demo, and we'll connect Fakturownia with you.
- fakturownia
- ksef
- poland
- invoicing
- vat invoice
- equipment rental software
- rental business
- integration
- requiply